Raspberry Pi 5 setup with metal case active cooling and 7" touchscreen
This blog post describes my learning journey with setting up a new Raspberry Pi 5 for future learning with local LLMs, Observability, CI/CD. It starts with hardware considerations and gets the minimum setup running with an SD card. Ultimately, the setup adds a metal case and touchscreen support.

After studying Hardware/Software Systems Engineering 20 years ago, I've always been fascinated by the design and performance of modern embedded hardware. The Raspberry Pi architecture is no different. Generative AI with LLMs, cloud-native Kubernetes deployments, Observability, and CI/CD builds provide great use cases – but it was impossible to get a Raspberry Pi for a while until the recent Pi 5 launch.
This blog post describes my learning journey with setting up a new Raspberry Pi 5. It starts with hardware considerations, and gets the bare minimum setup running with an SD card. Ultimately, the setup is modified with a metal case and touchscreen support. You can follow my learning path, or assemble everything in one go. The full hardware list, cost and where to buy is available at the end of the blog post. Future blog posts will explore local LLMs, CI/CD builds and more.
Hardware - what to buy
My requirements: The setup should run observability probes 24/7, allow CPU bursts for generative AI prompts or CI/CD builds, and provide enough storage for all learning experiments.
The bare Pi 5 setup should not exceed 150 EUR, additional displays and network setup should not exceed 300 EUR in total. Additional PI 5 boards for clustering, faster SSD storage, etc. can be considered in the future.
Following the requirements, I went to collect, compare and buy all hardware components described below.
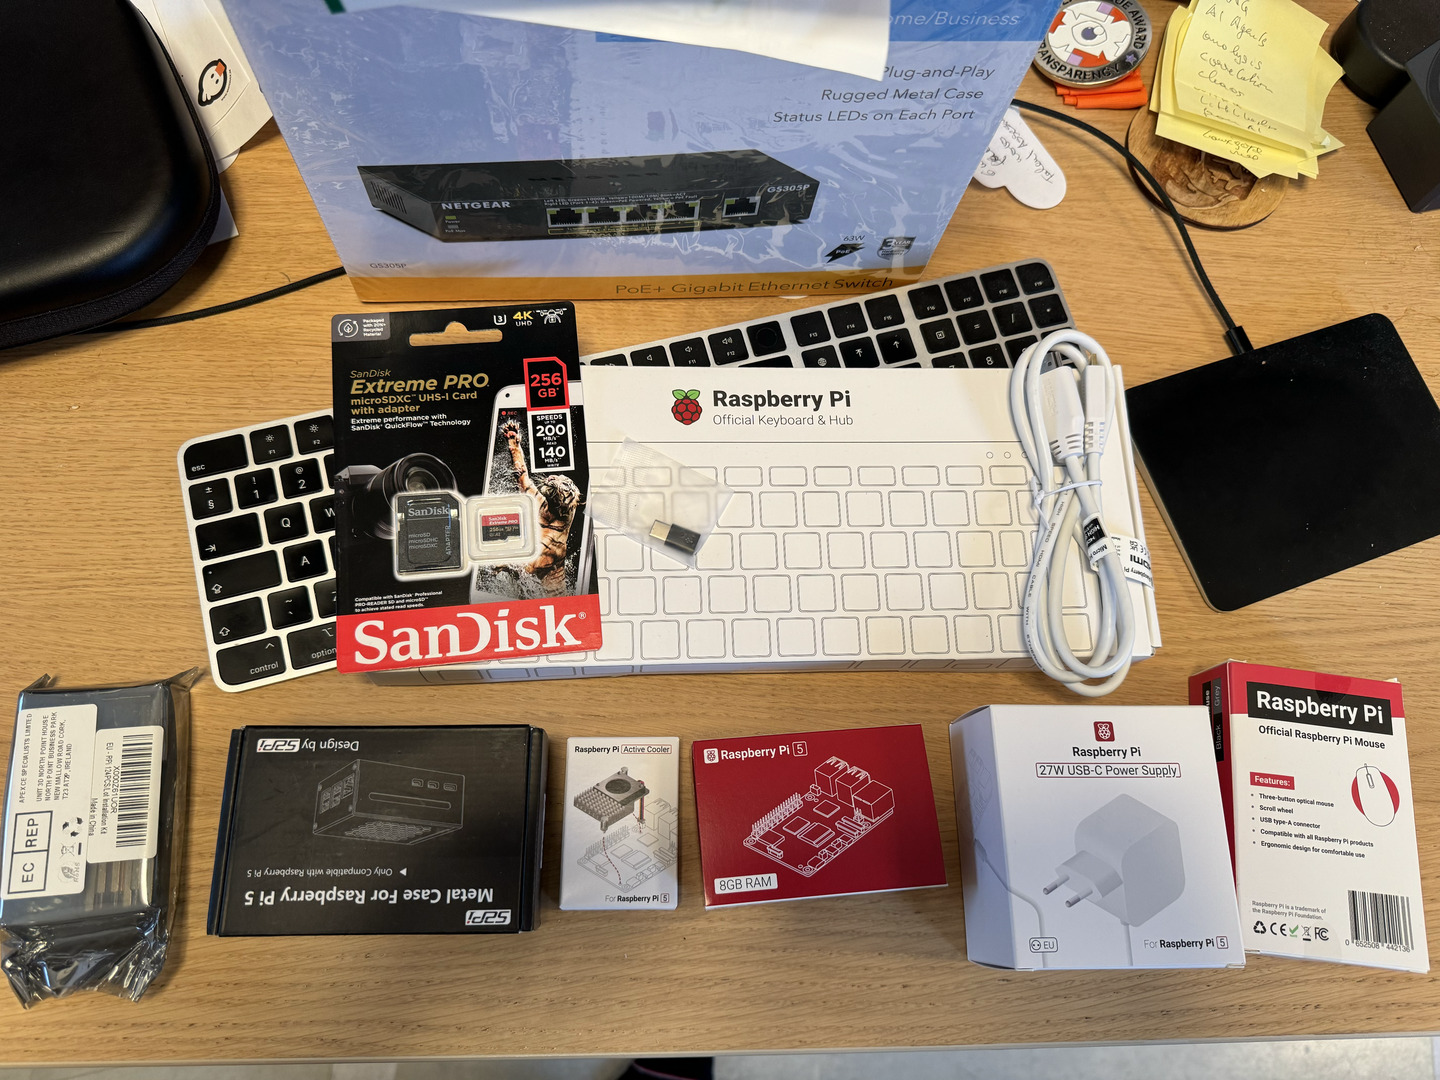
Raspberry Pi 5, 8 GB RAM + Cooler Kit
Since I want to test large language models, run observability tools, and build CI/CD pipelines on the Pi 5, I went for the biggest hardware with 8 GB RAM. The 4 GB model is ~23 EUR cheaper (63 vs 86 EUR at Welectron).
I could not decide whether to get the official Raspberry Pi case, so I opted to get it later, or an alternative that supports NVMe SSDs. I would still need a cooler, power supply, cables: Fortunately, Weletrcon offers a special cooler kit which includes the official Pi 5 Active Cooler, official 27W USB-C Power Supply, and 1m micro-HDMI cable.
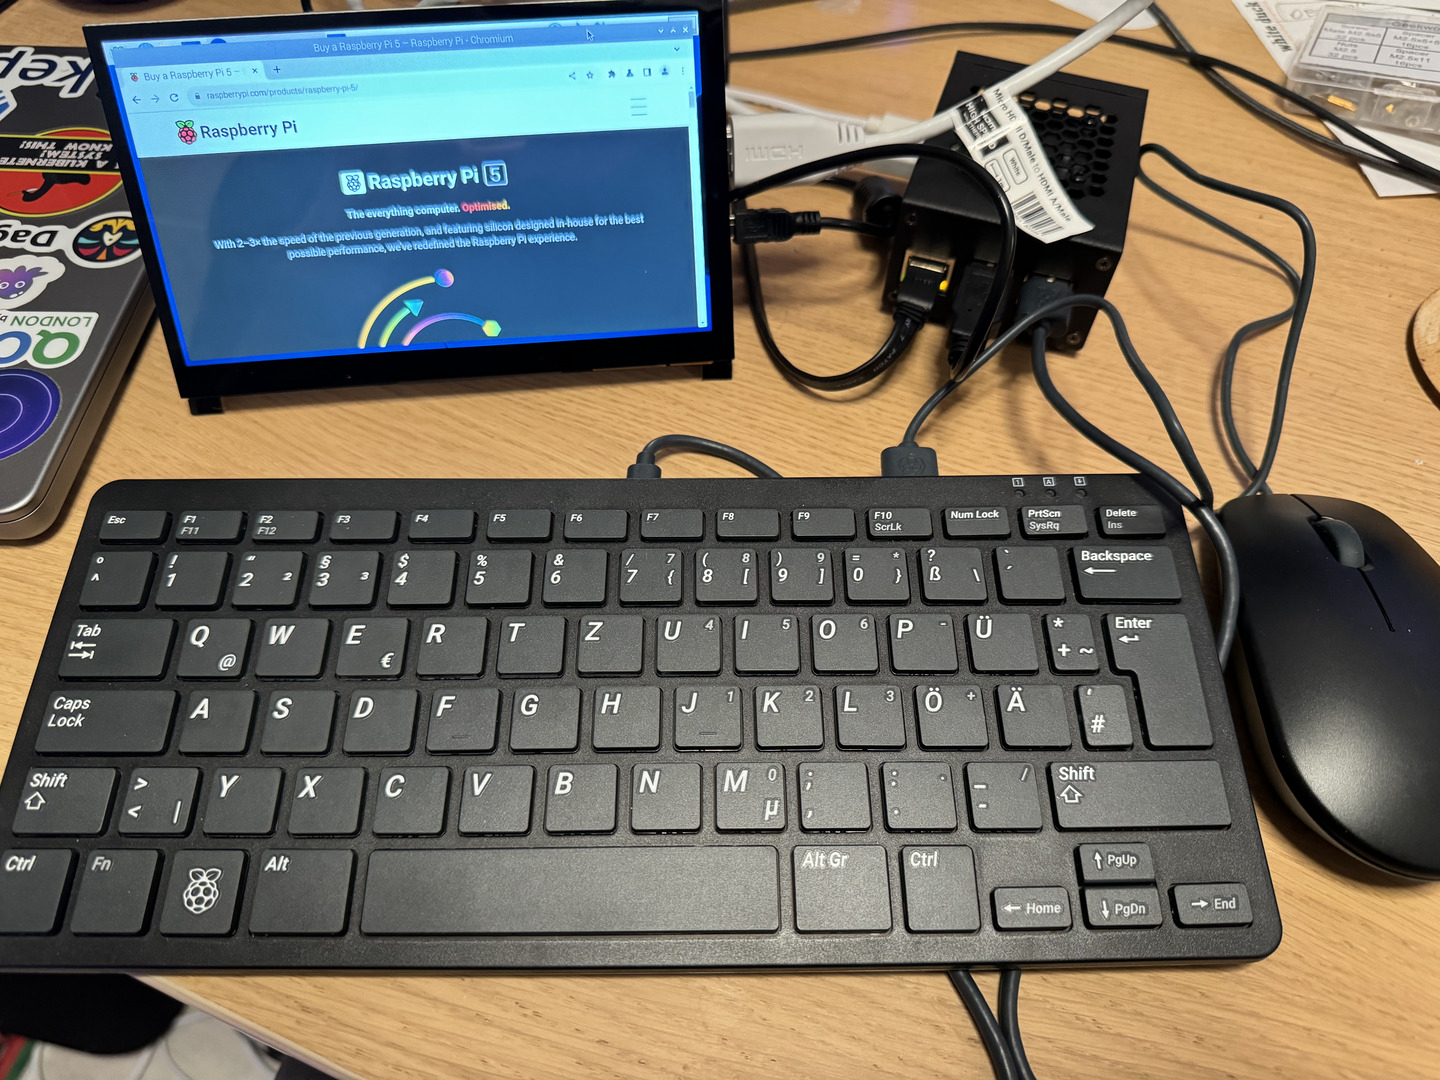
Mouse/Keyboard
For the initial setup and exploration, I recommend getting a keyboard/mouse with USB 2.0 support, for example, the official mouse and keyboard. Both do not take too much space on your desktop, and are a great backup for maintenance, too.
Storage
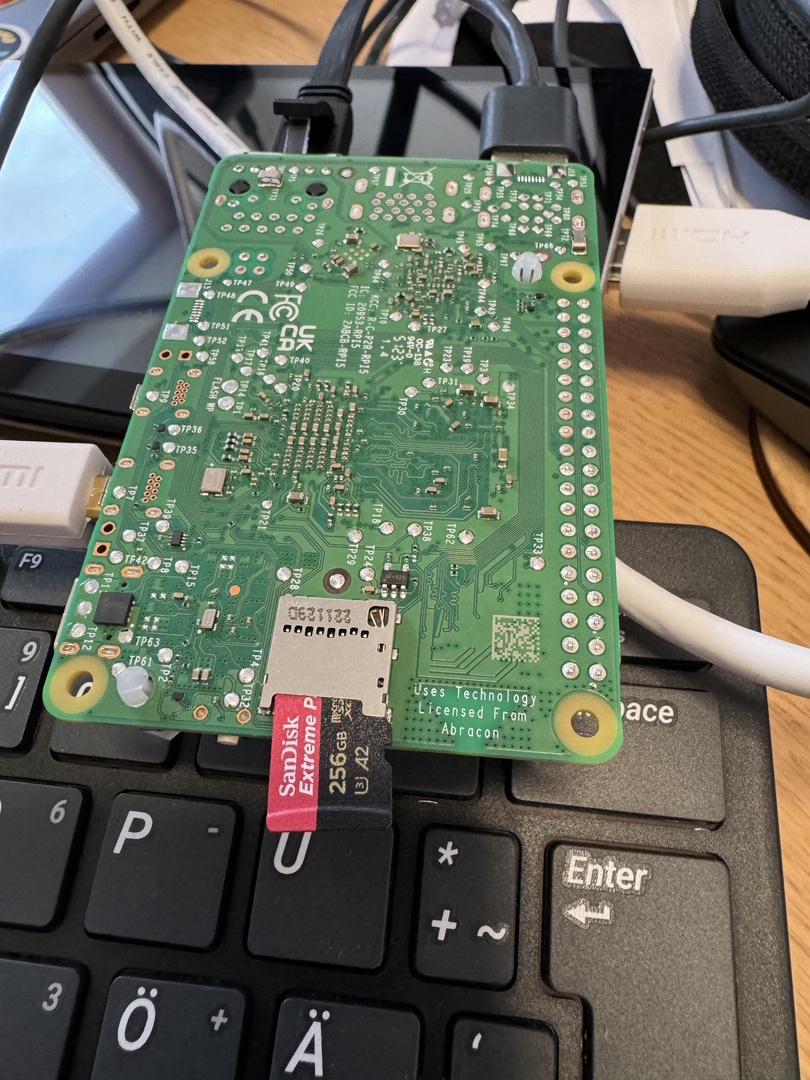
First iteration, I went with an SD card, also knowing that the Pi 5 greatly improved the performance of read/write operations (PCworld article). Inspired by Philippe Charrière's blog post about running Ollama on a Pi5, I bought the SanDisk Extreme PRO A2 200 MB/s microSD microSDXC 256GB, including an SD card adapter for the Macbook Pro slot. Note: Raspberry Pi 5 supports up to 2 TB sizes as boot devices. In the future, I want to explore the NVMe Base for Raspberry Pi 5 – NVMe Base + 500GB SSD options.
Network
The Raspberry Pi 5 comes with Wifi support out-of-the-box. For local gigabit networks, I bought a new Netgear switch: NETGEAR GS305P PoE Switch 4 Port Gigabit Ethernet LAN Switch PoE+ 63W (5 Ports Plug and Play Network Switch PoE, Fanless, Robust Metal Case). Additionally, I got new CAT7 ethernet cables from Ugreen. Note: Consider getting an 8 port model or build a stack of multiple switches for many Pis.
External display
I highly recommend getting a small external display, or have an HDMI enabled monitor available for the initial setup with the microHDMI cable connected. Note that the Raspberry Pi 5 does not support video through USB-C (i.e. through a docking station).
I could not decide whether to get a touch screen, and which size would fit. In the end, the display needs to solve two things:
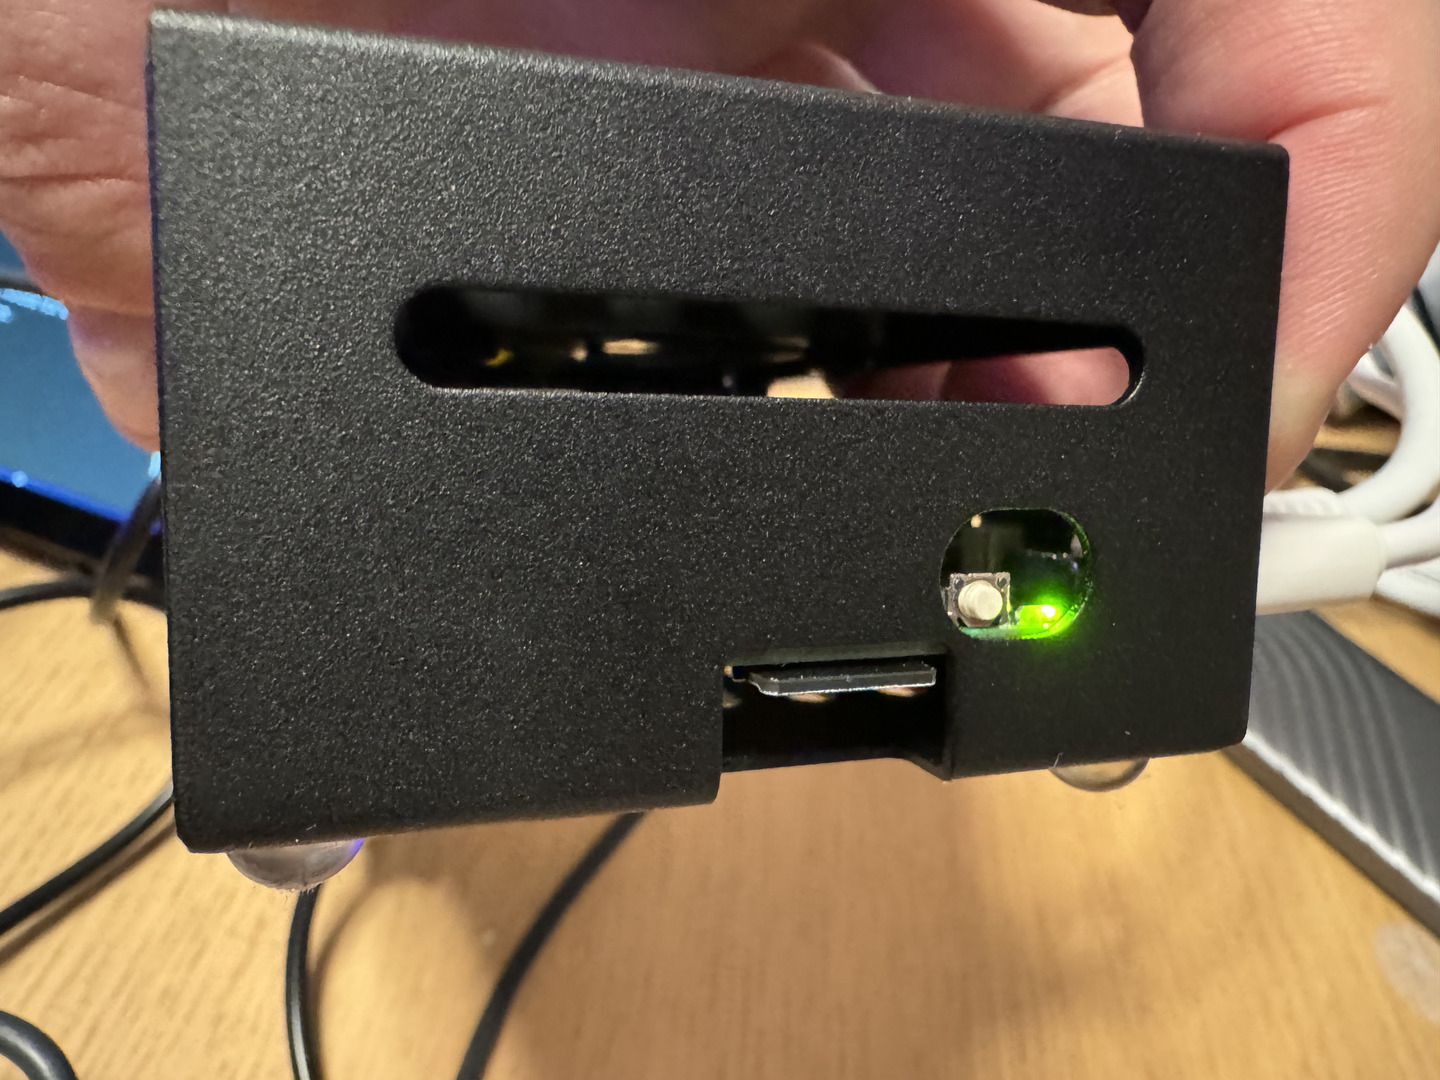
- Help with the initial setup (see something, and do not debug LED flashes in the dark).
- Display a dashboard or otherwise useful information (optional)
The official Raspberry Pi Touch Display with 7 inch requires assembly through an adapter board that handles power and signal conversations. It also seems to require a change with pins that are not compatible. In my use case, I want to plug&play the display through HDMI instead. The resolution of 800x480 is also lower compared to other vendors. Waveshare supports 1024x600, but it was unclear if Raspberry Pi 5 is supported (some users noted a driver installation, making things more complicated). There are also AMOLED screens with higher resolution available, exceeding the price range of 100 EUR easily.
Because of my simple use case, I decided to go with the Wimaxit 7 inch touch screen, M728. Still not cheap at 66 EUR, but I follow the idea of avoiding "Buy cheap, buy often". There is also a larger M1012 model with 10.1 inches available. The 7 inch model supports a resolution of 1024x600 and comes with a display stand. It requires a display connection using HDMI, power and the touch screen functionality work through USB only, using a USBA-to-microUSB connection cable.
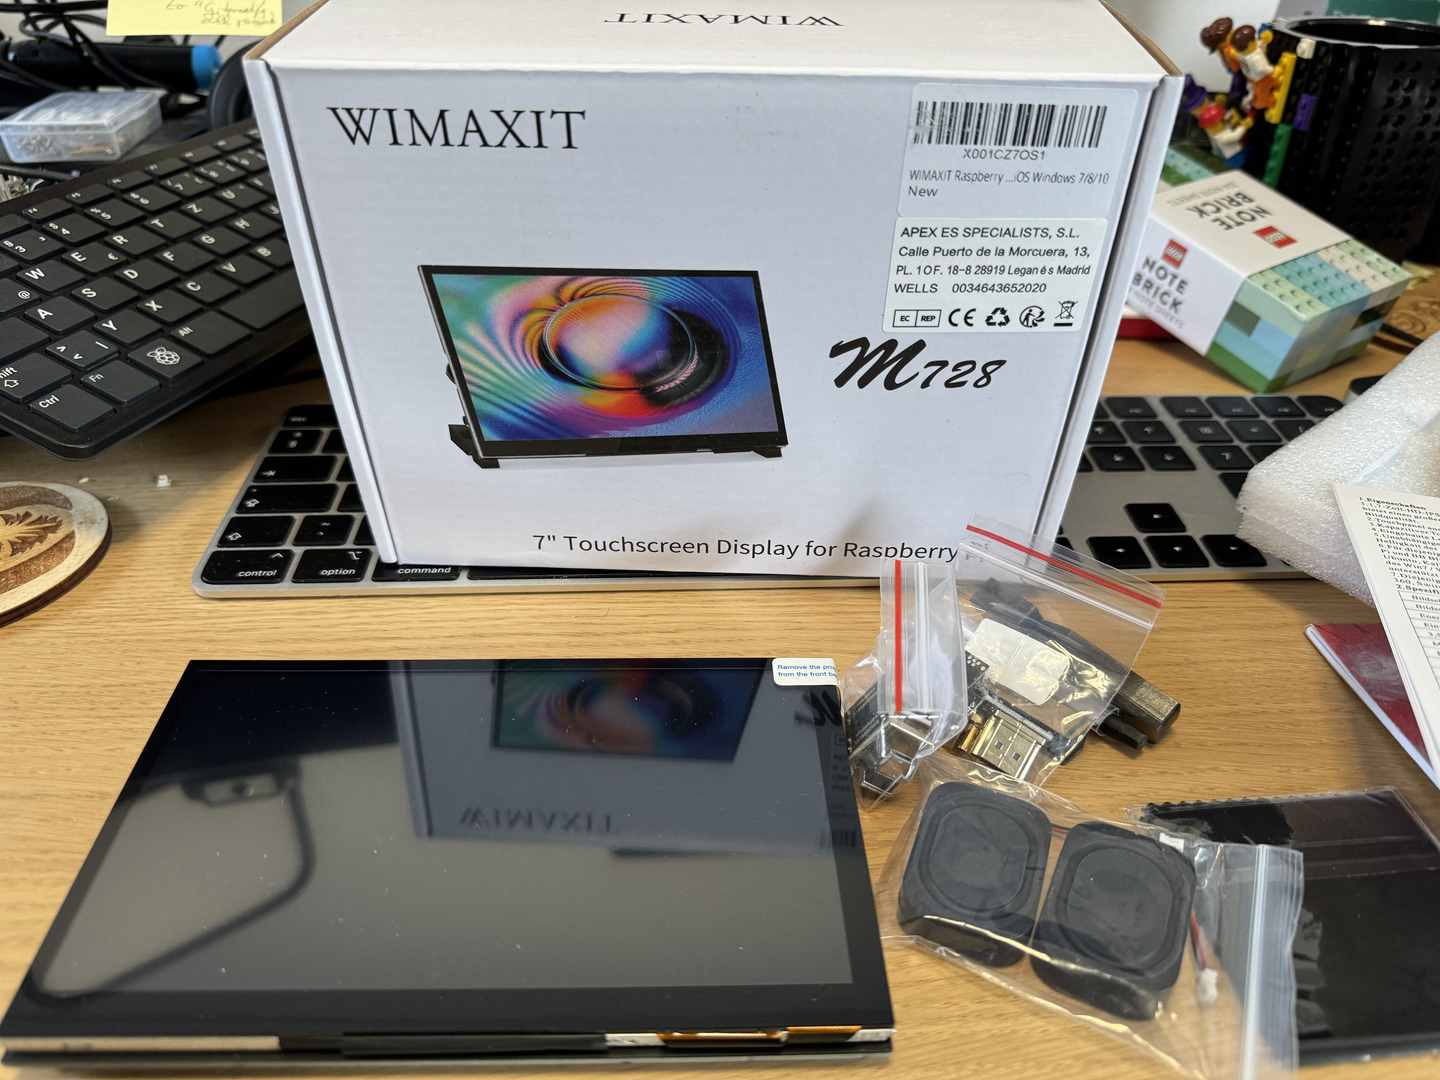
Note: If you are looking for a display where the Raspberry Pi 5 can be attached at the back - do not buy the Wimaxit touch screen. The advertised connectors for HDMI and power only work with 4B and 3 models.
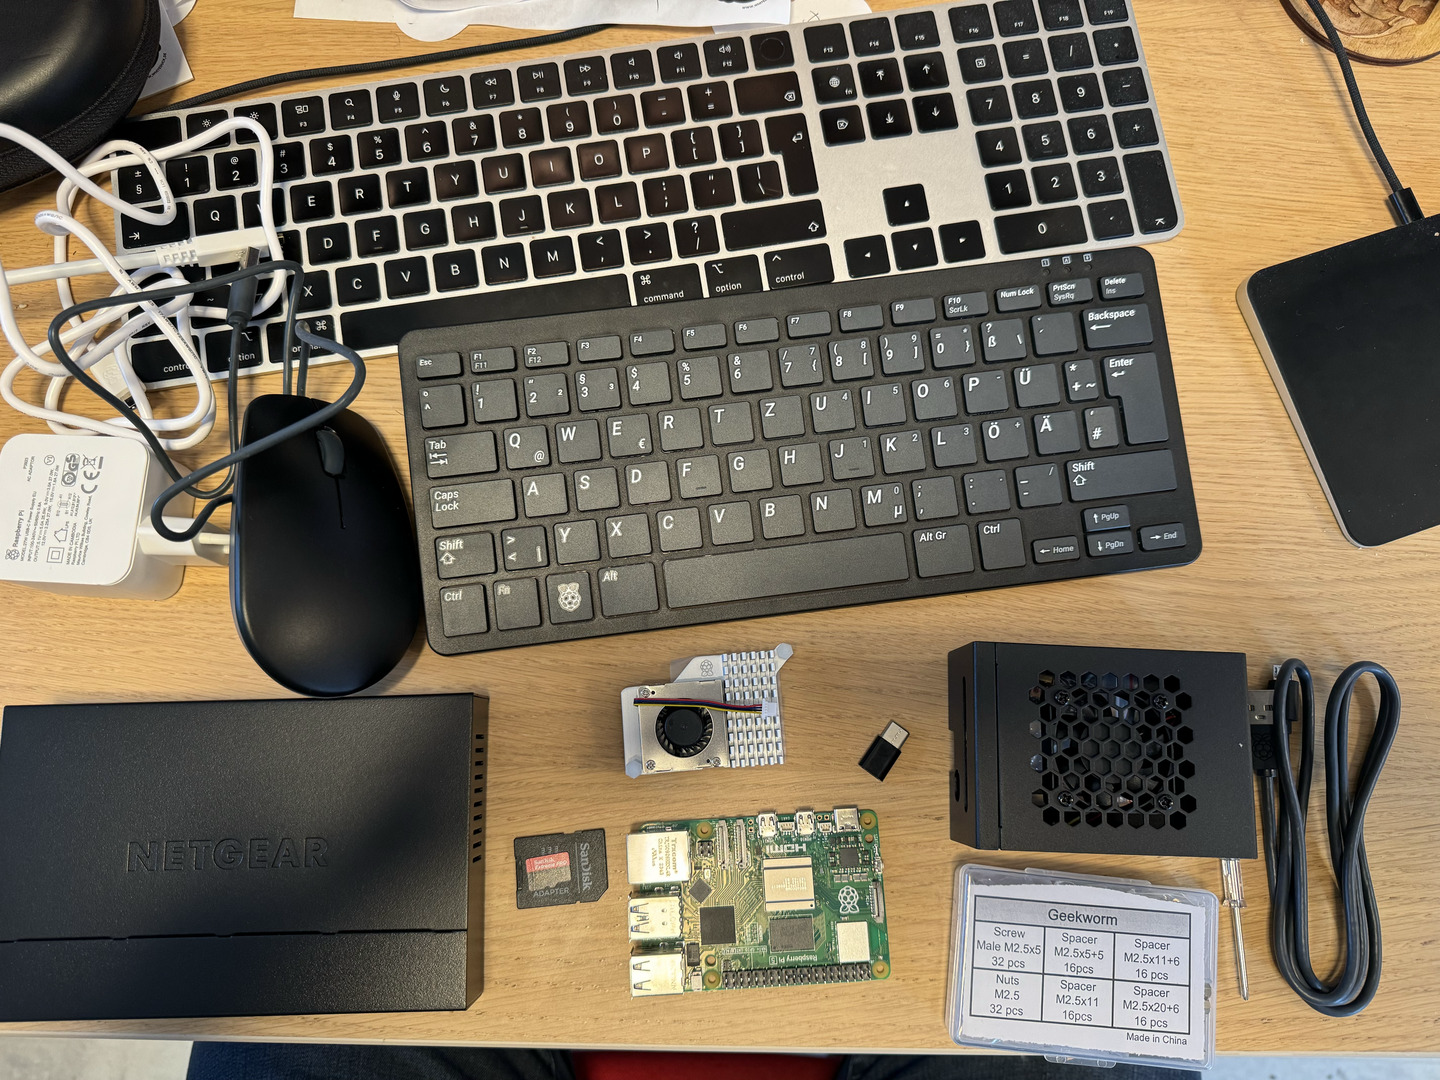
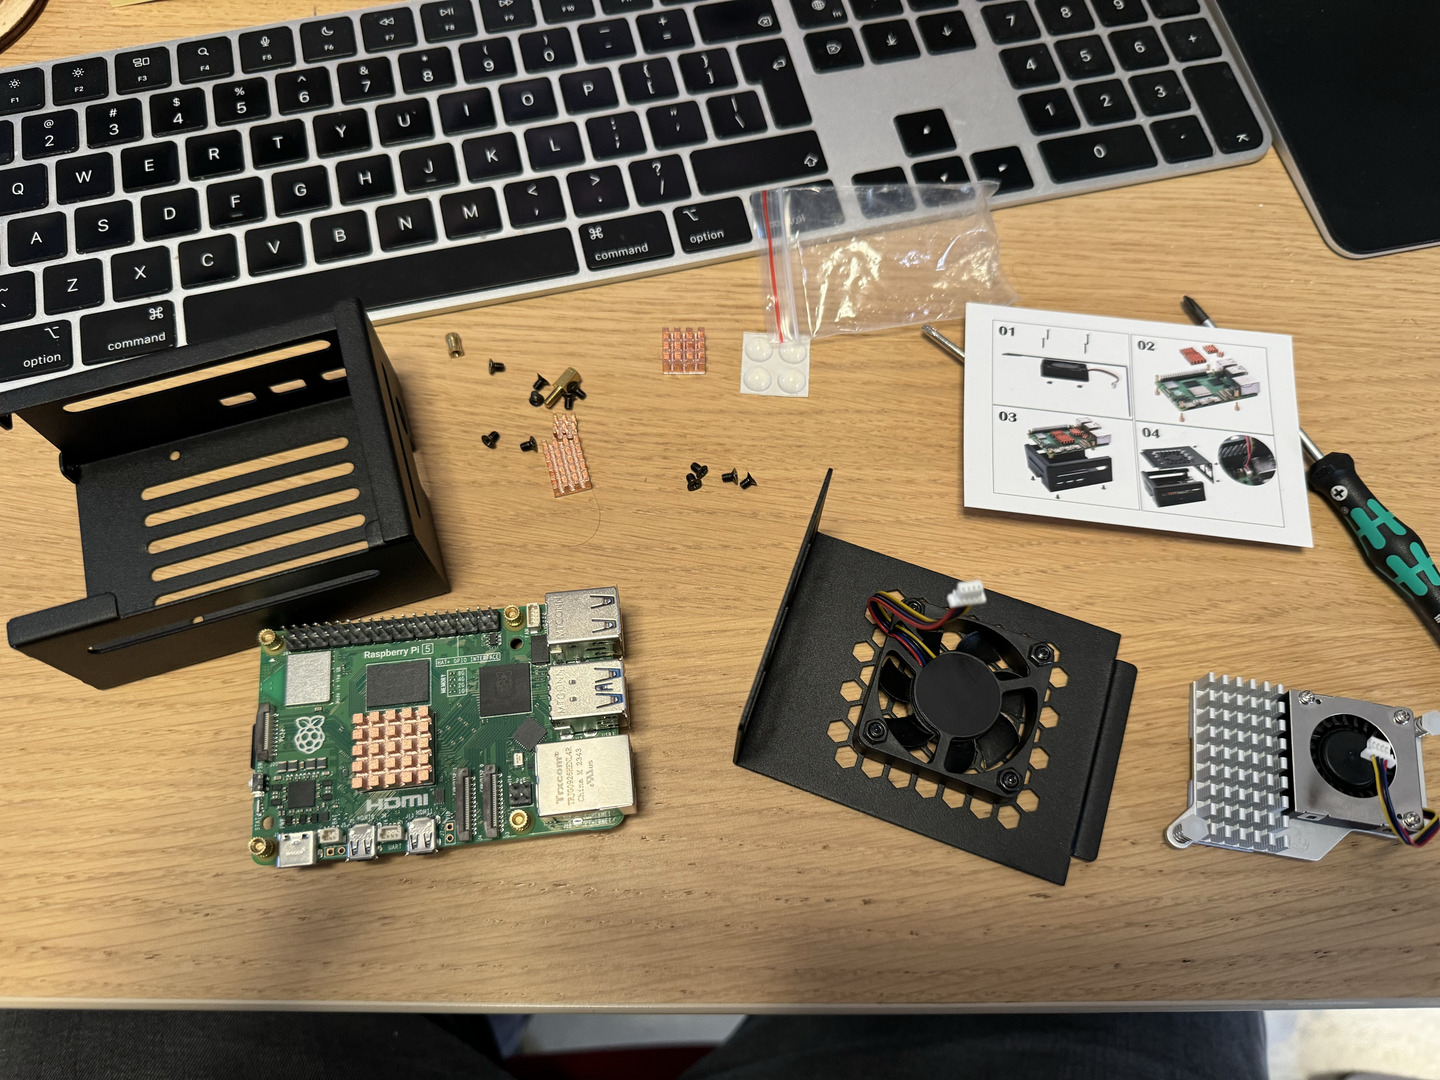
Getting started: Assembly
- Put the Raspberry Pi 5 onto a neutral surface (wood, plastic, glass).
- Position and connect the active cooler onto the Raspberry Pi 5 SOC.
- Connect mouse/keyboard with the grey USB 2.0 ports, the blue ports are USB 3.0 for fast external storage, or power supply.
- Connect the ethernet port with a cable to the switch
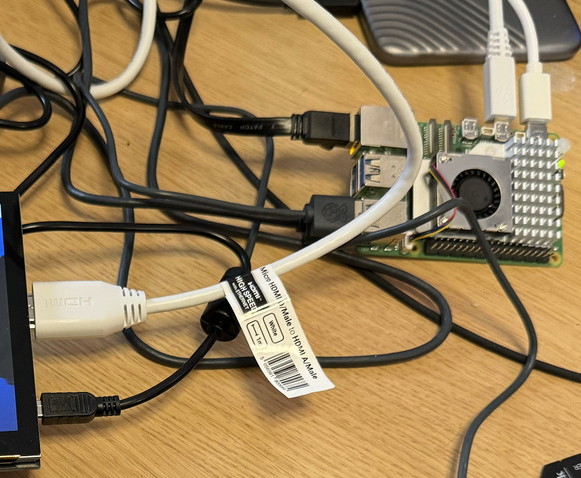
- Connect the microHDMI cable with the touch screen display
- Connect the microUSB cable with the display power port, and an external power supply (USBA 3.0). Note: We'll learn about touch screen and Pi power power supply support later.
- Prepare the power supply cable for the USBC port, but do not plug it in yet.
Getting started: Software
Insert the micro SD card into the adapter and media card slot of your computer.
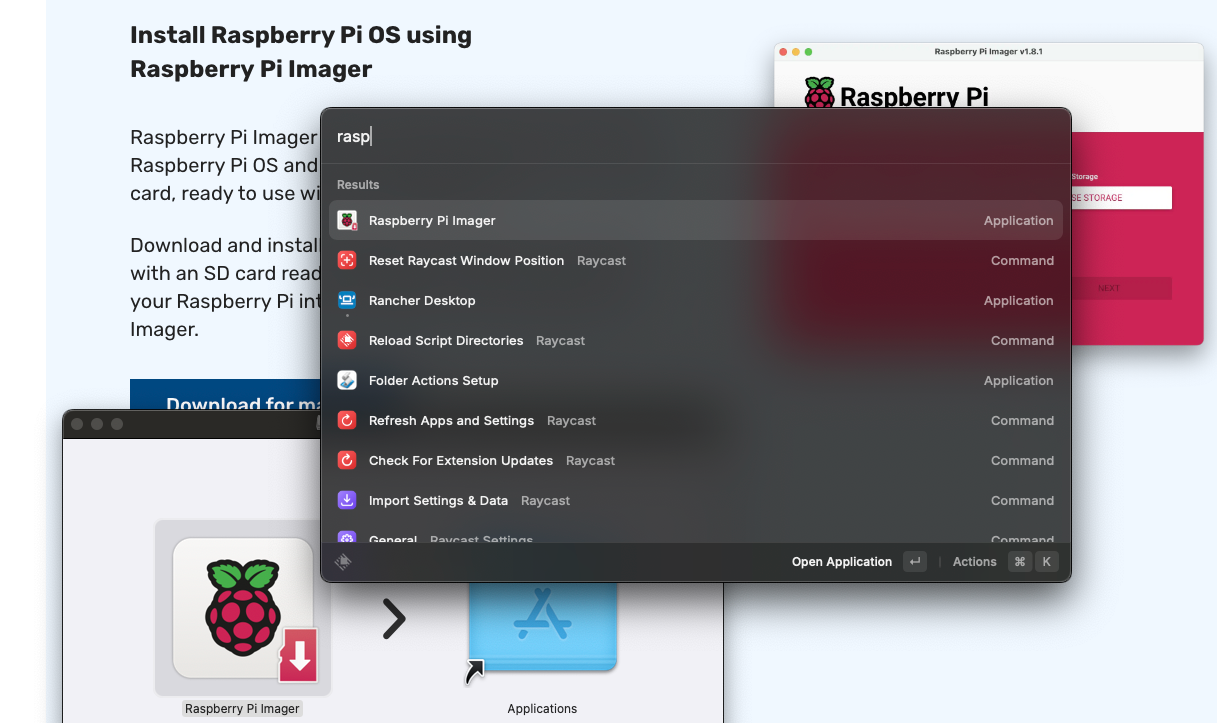
Follow the official getting started documentation and download the Raspberry Pi Imager. On macOS, double click the dmg and drag&drop the Imager into the Applications directory. Next, either navigate there or use a shortcut tool like Spotlight or Raycast to open the application.
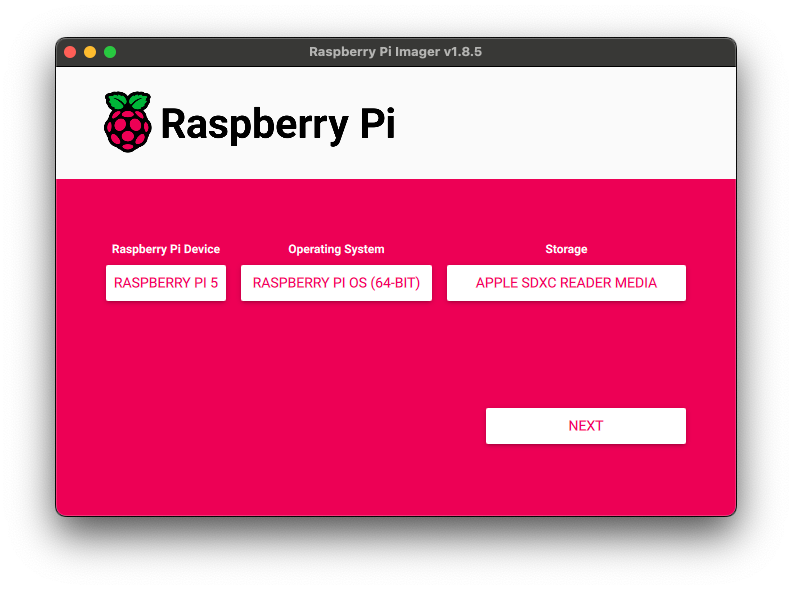
Permit to open the application, and select the following entries:
- Raspberry Pi device: Raspberry Pi 5
- Operating System: Raspberry Pi OS (64 bit)
- Storage: Apple SDXC Reader Media (SD card reader device)
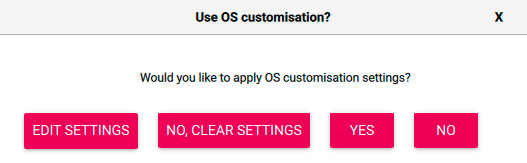
The dialogue will ask you about custom settings, select Edit Settings. This process is similar to cloud-init configuration provisioning (for example, with Hetzner Cloud VMs in this blog post).
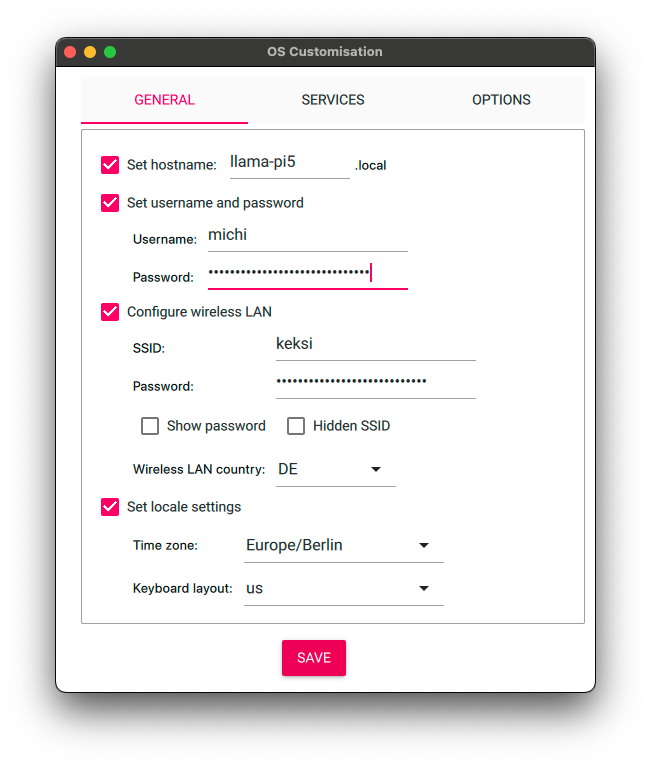
- General: Hostname (llama-pi5), Username/password (michi/generated and stored in 1Password), WLAN SSID/password (keksi), locale settings (Europe/Berlin, us keyboard layout)
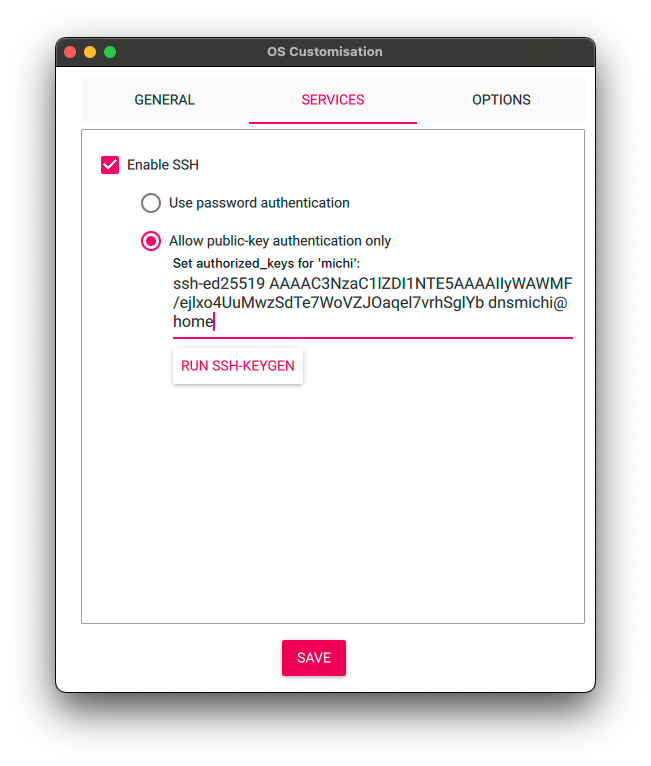
2. Services: Enable SSH, allow public-key authentication only. Add public SSH key (requires 'General' username) - cat ~/.ssh/id_ed25519_dnsmichi.pub
Eject the SD card, and put it into the SD card slot on the Raspberry Pi 5.
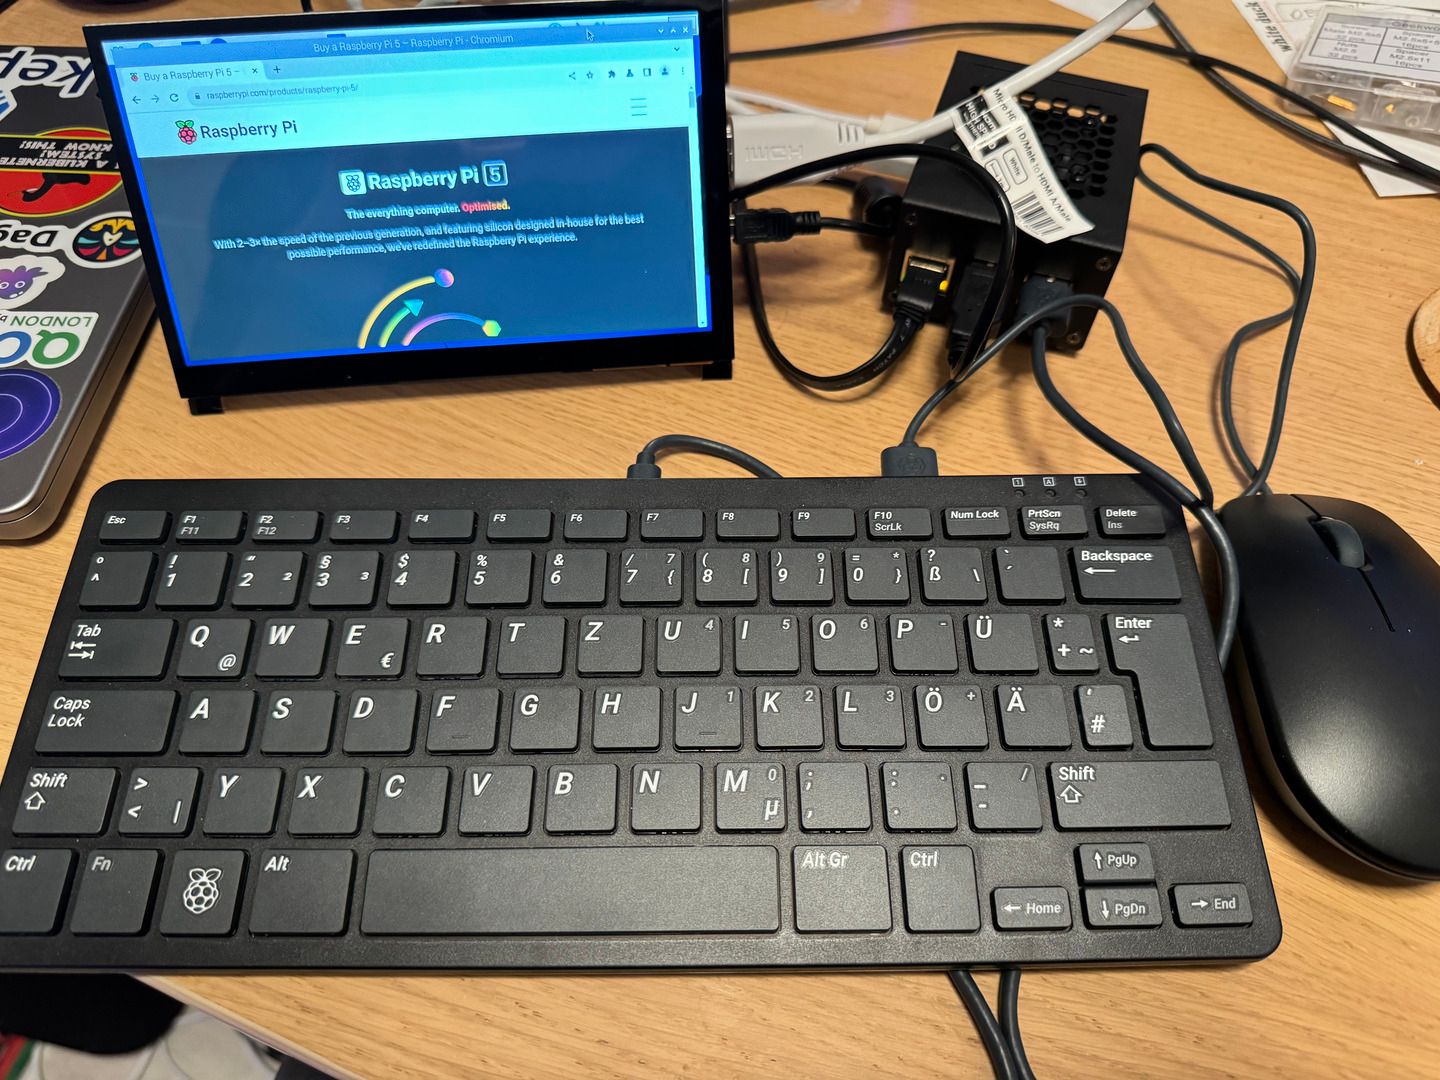
Getting started: First boot
Connect the USBC power plug with the Raspberry Pi 5, and wait until the display greets you with the GNOME desktop (or the terminal if you have selected a minimal lightweight OS).
Exploration
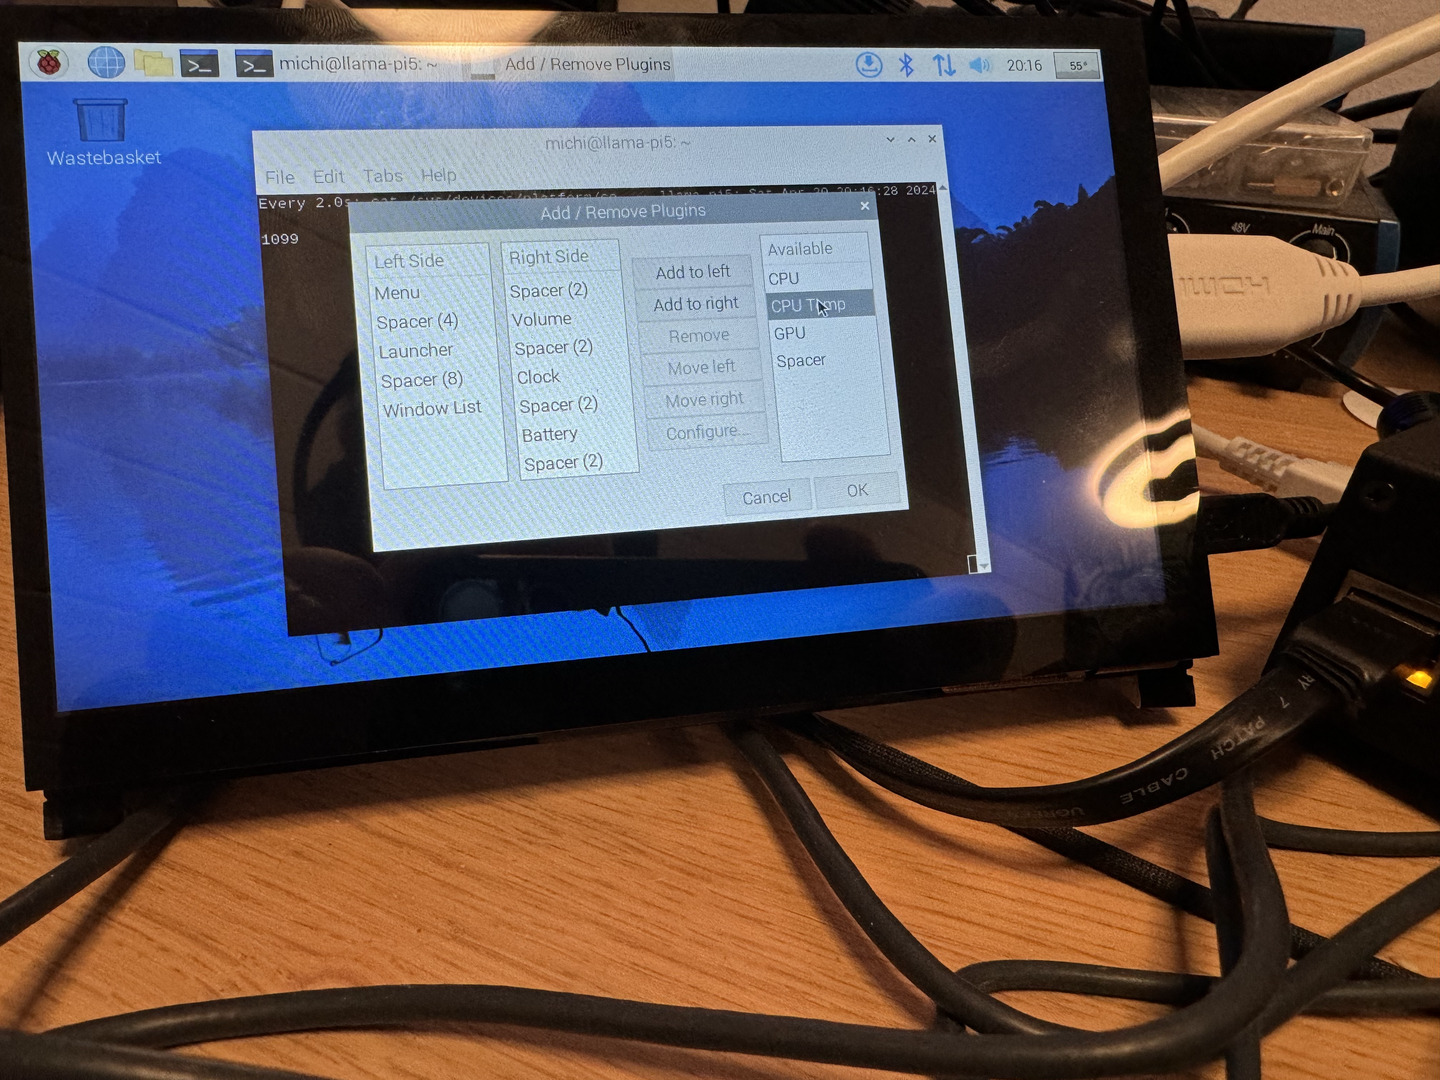
As a first step, open a new terminal, and watch the CPU fan speed (rounds per minute, RPM), and temperatures:
# Active cooler RPMs
watch cat /sys/devices/platform/cooling_fan/hwmon/*/fan1_input

1114

# ARM CPU temperature, divide result by 1000
cat /sys/class/thermal/thermal_zone0/temp

55100

# GPU temperature
vcgencmd measure_temp

temp=56.5'C
You can also add the CPU temperature into the task menu. Right click on it, select Add / Remove Plugins and select CPU temp from the right Available column. Click on Add to right and OK to show the temperature on the upper right corner.
Connect through SSH
On the Pi 5, get the assigned IP addresses from the terminal:
# List all network interfaces
ip a
On your computer, open a terminal and connect to the IP address using the username and SSH key:
# On my Macbook
ssh 192.168.2.175 -l michi -i ~/.ssh/id_ed25519_dnsmichi

Linux llama-pi5 6.6.20+rpt-rpi-2712 #1 SMP PREEMPT Debian 1:6.6.20-1+rpt1 (2024-03-07) aarch64
Password-less sudo comes preconfigured, and allows to immediately upgrade the system. Tip: Enable unattended upgrades and manage the OS through Ansible (more in a future blog post).
sudo -i

apt update

apt upgrade
Zero trust: SSH, firewall, fail2ban
In the Raspberry Pi Imager settings, I already disabled password authentication using SSH. Although the Pi 5 runs in my local network, I might bring it to a meetup or event, or otherwise expose it to external audiences. Therefore, I highly recommend securing SSH, and adding a firewall.
vi /etc/ssh/sshd_config

PasswordAuthentication no
PermitRootLogin no
MaxAuthTries 2

X11Forwarding no
AllowTcpForwarding no
AllowAgentForwarding no

systemctl restart sshd
Install ufw as firewall, default rules to http and ssh, and configure fail2ban for SSH authorization failures.
apt update && apt -y install ufw fail2ban nginx

printf "[sshd]\nenabled = true\nbanaction = iptables-multiport" > /etc/fail2ban/jail.local

systemctl enable fail2ban
systemctl start fail2ban

ufw allow 'Nginx HTTP'
ufw allow 'OpenSSH'
ufw enable
Hardware modifications
After the initial setup was working, I decided to optimize the setup with an additional case and touch screen support. You can immediately start with the full assembly, or follow my learning iterations.
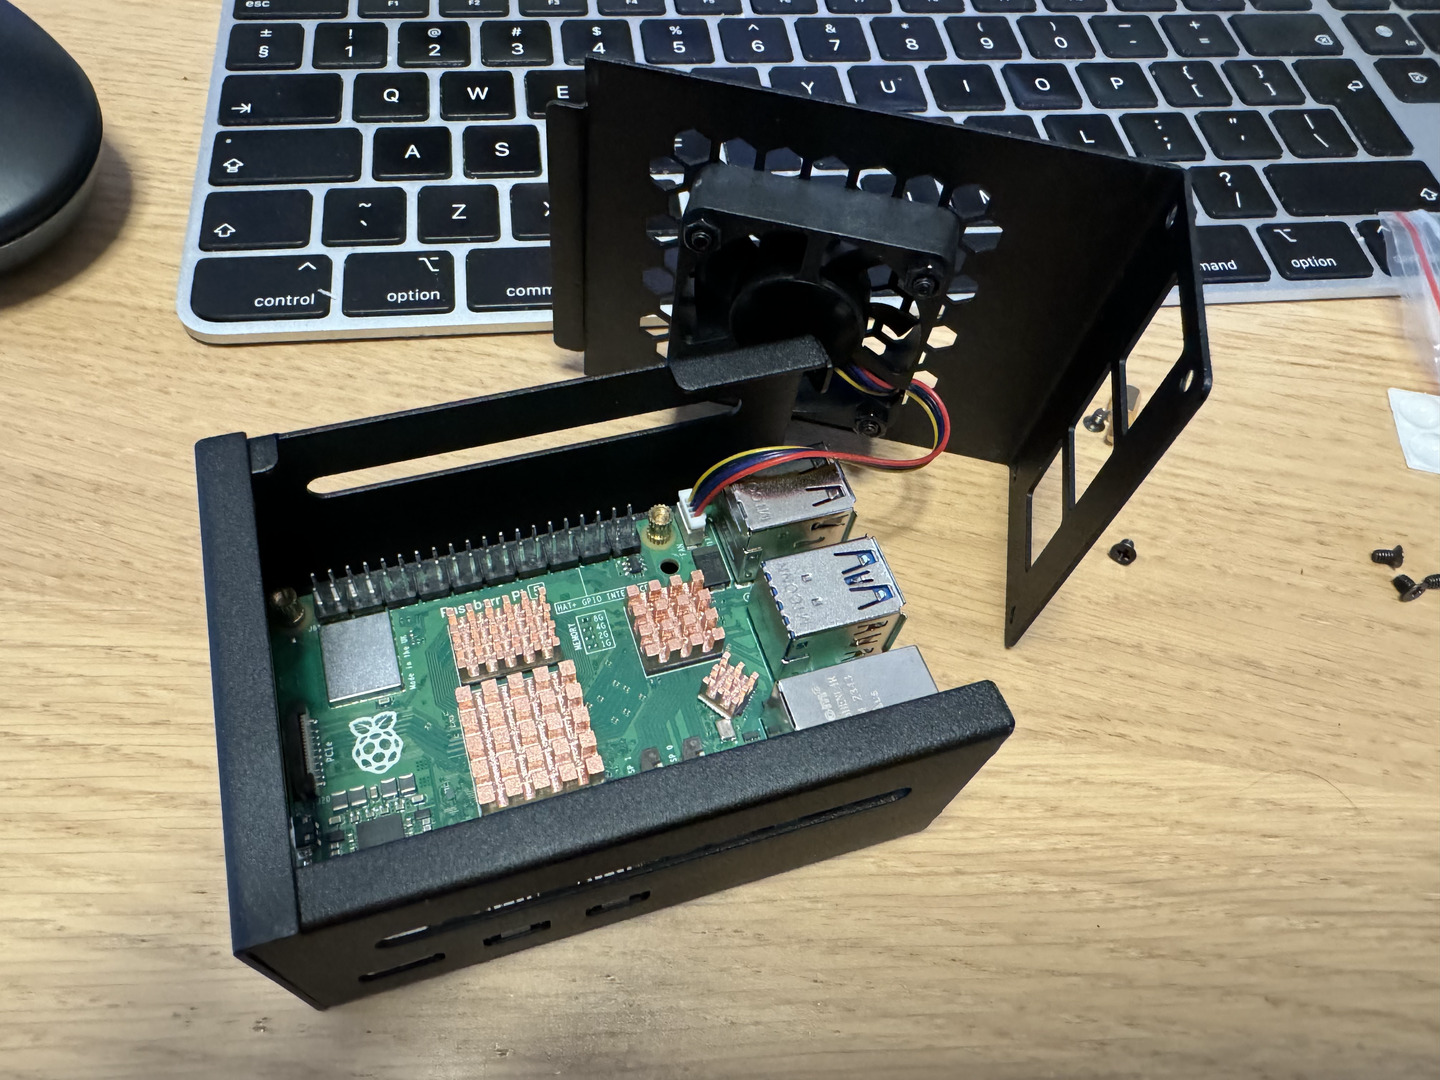
Metal Case
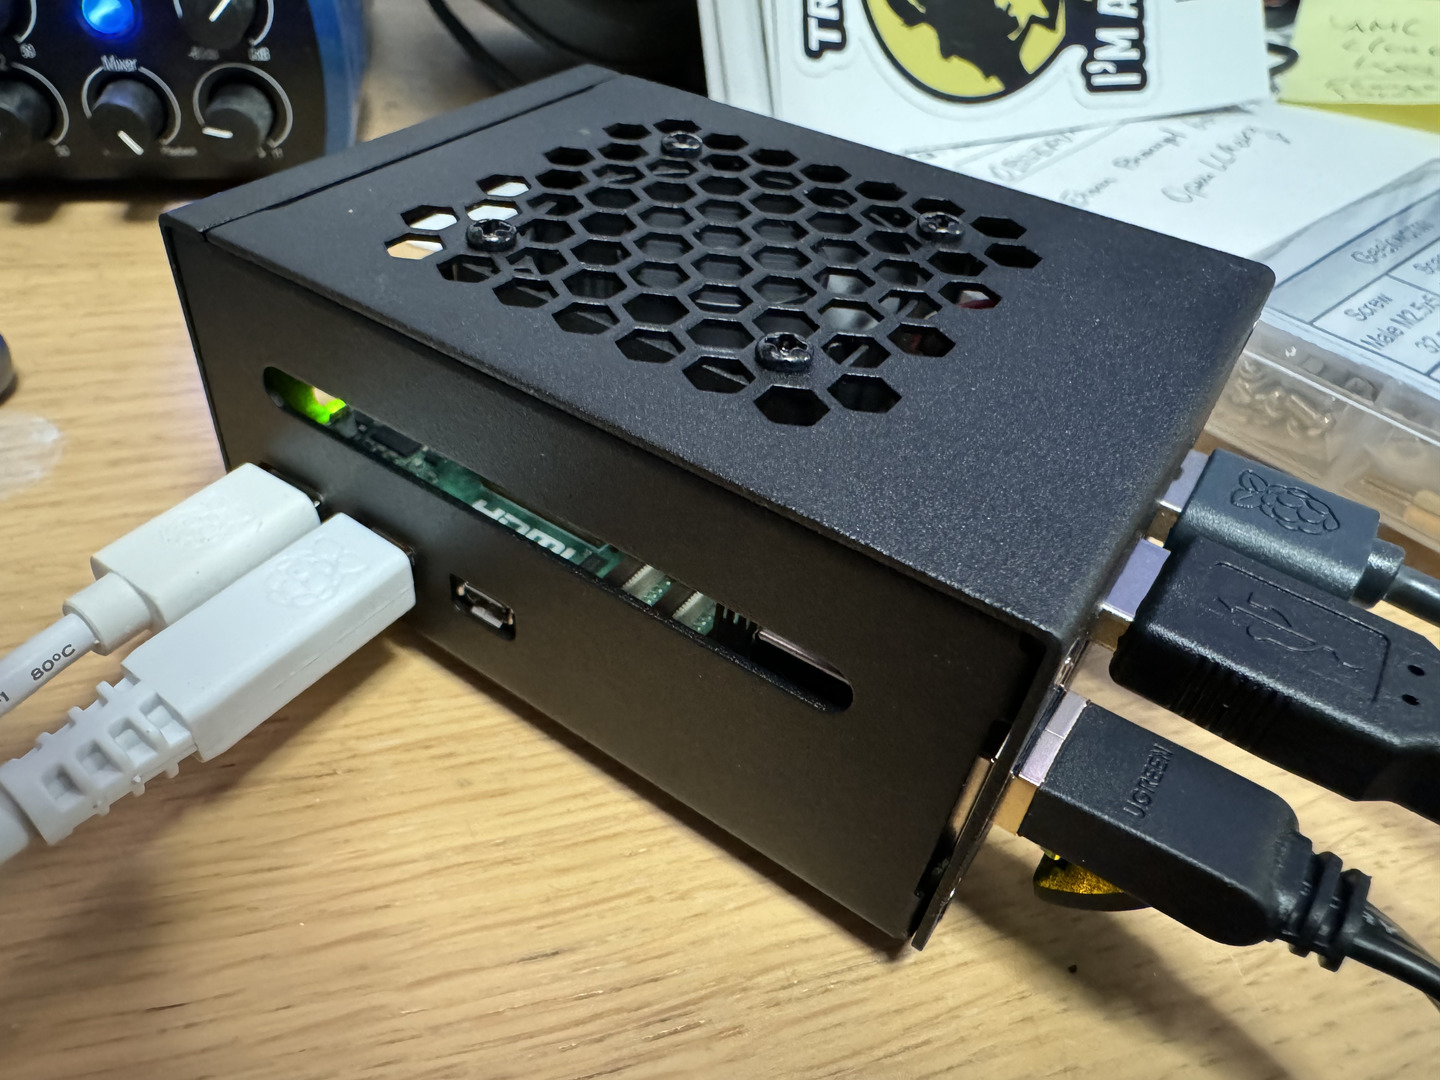
The Raspberry Pi 5 can get hot at the bottom, while the upper SoC is cooled with the default active cooler fan. After researching for the best Pi 5 cases, I landed on the GeeekPi Metal Case for Raspberry Pi 5, Support PCIe M.2 NVMe SSD Shield Top X1001 / X1000 / N04 /N05 & Raspberry Pi 5 Active Cooler, recommended in this video review (German).
The case also supports my idea of adding an NVMe SSD on top later, for more performance running LLMs, etc. The metal case adds a great look, too.
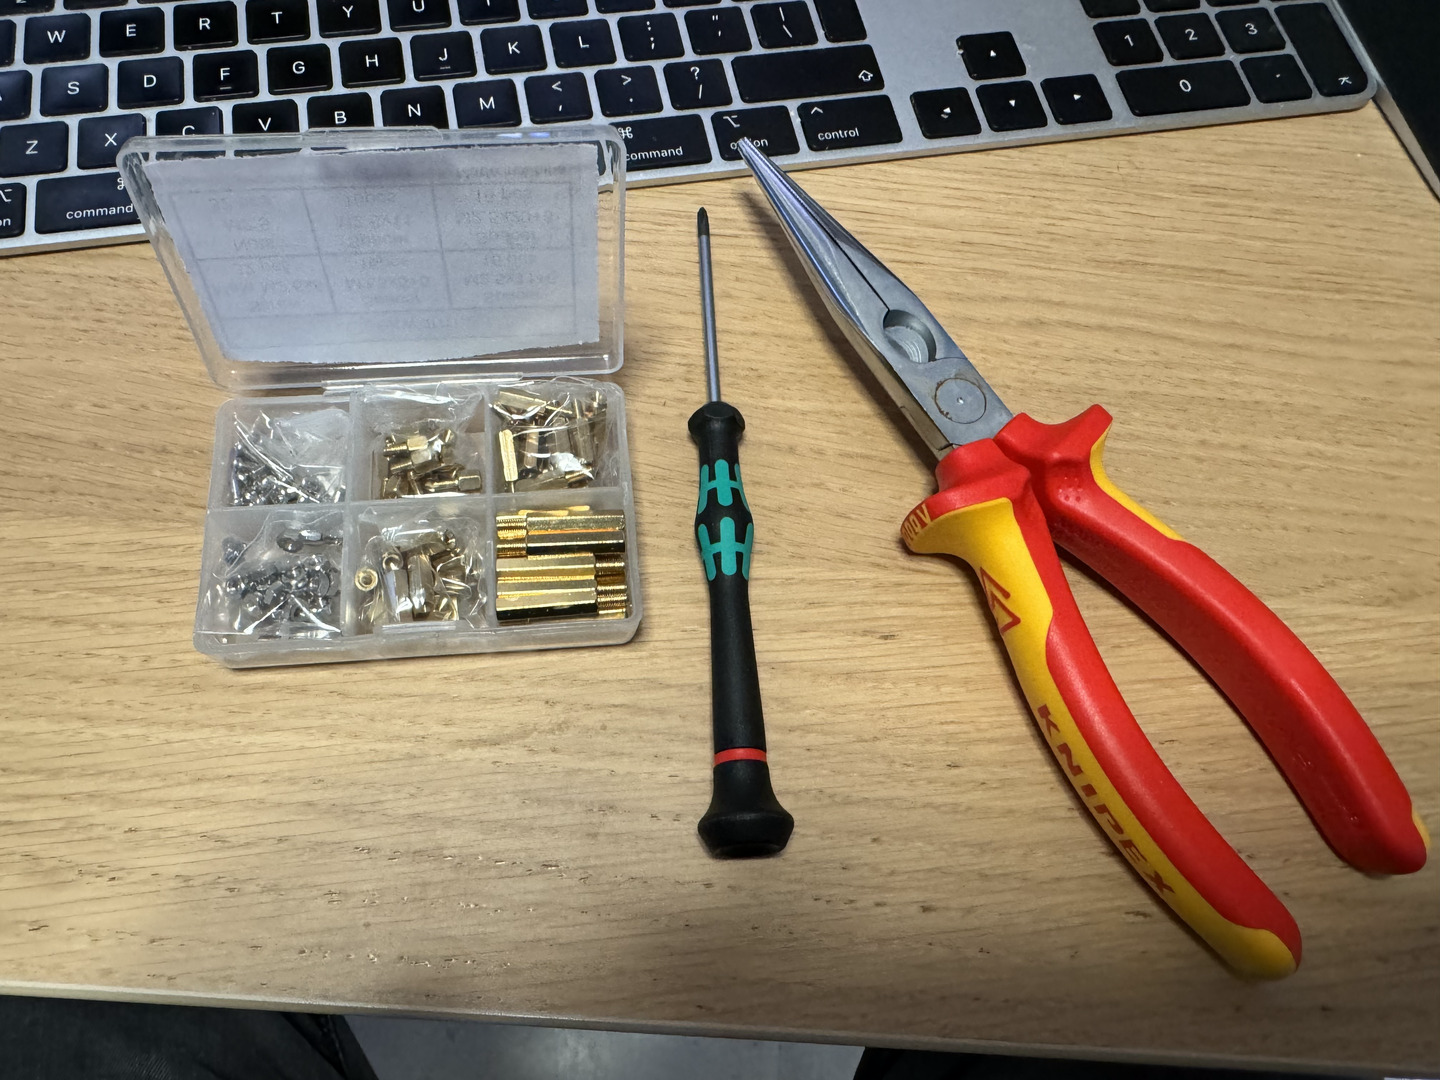
Moving the Raspberry Pi 5 into the metal case requires removal of the fan from the official cooler kit, which can be a bit tricky. I recommend using a bent nose pliers with cutting edge to press the plastic nob together and gently pull the fan connections. The GeekPi case comes with an active cooler itself, and passive heat pads for the Pi 5.
Alternatively, I have seen setups that keep the Pi active cooler on top of the Pi 5, and remove the GeeekPi cooler from the metal case. I will experiment with that in case the current cooling solution does not work.
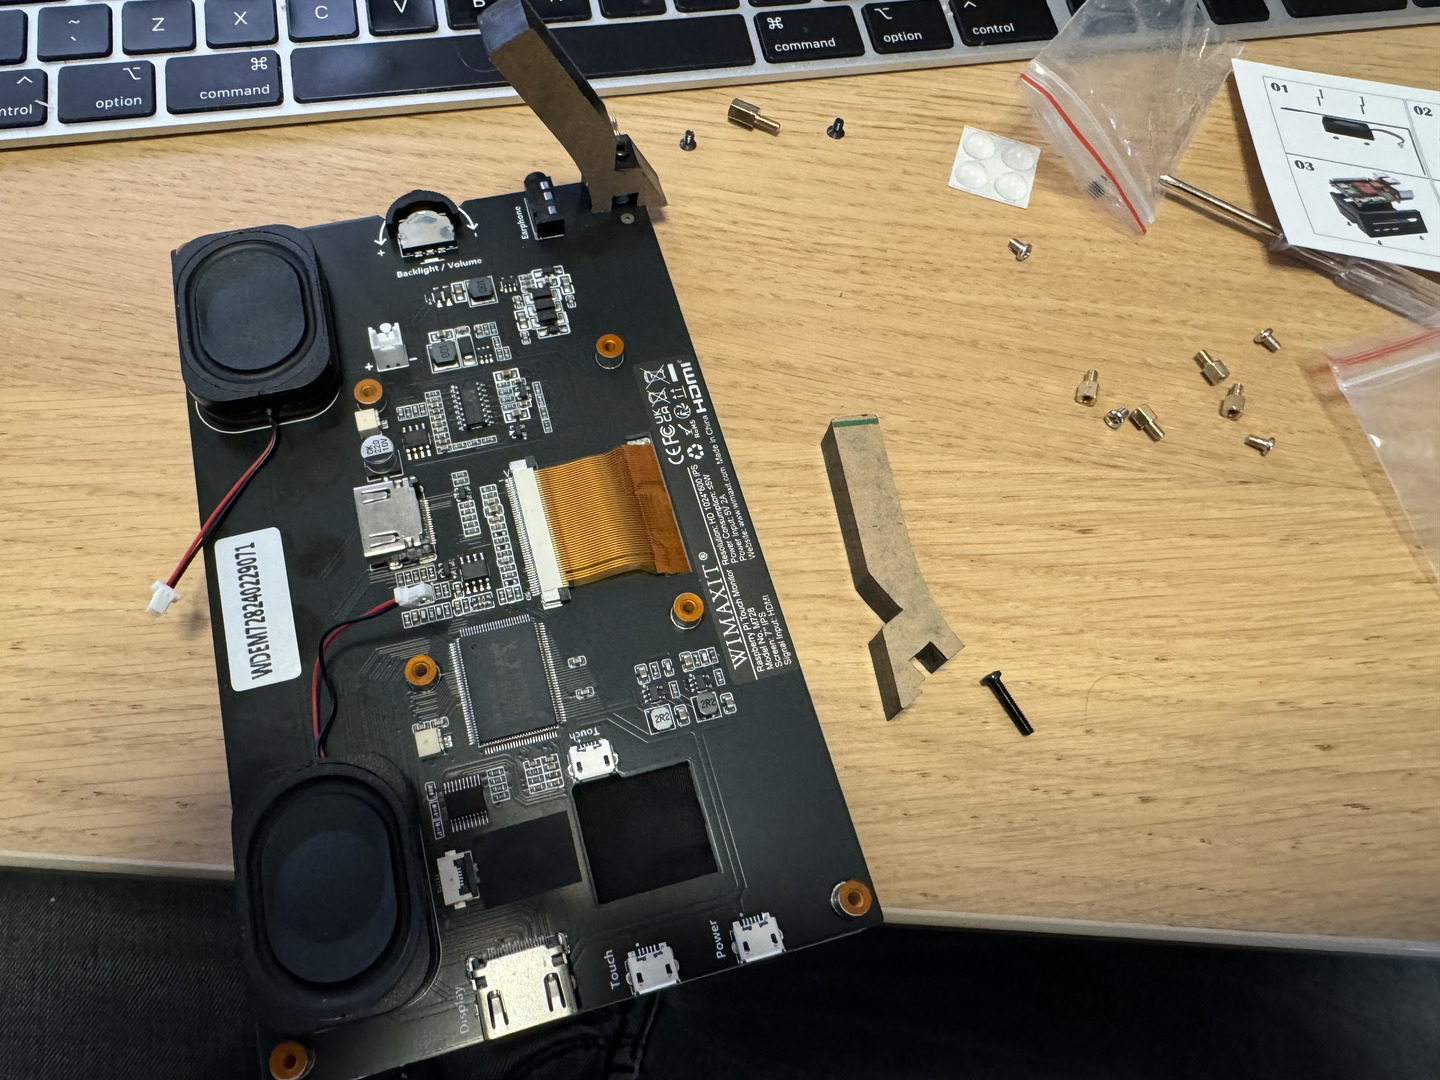
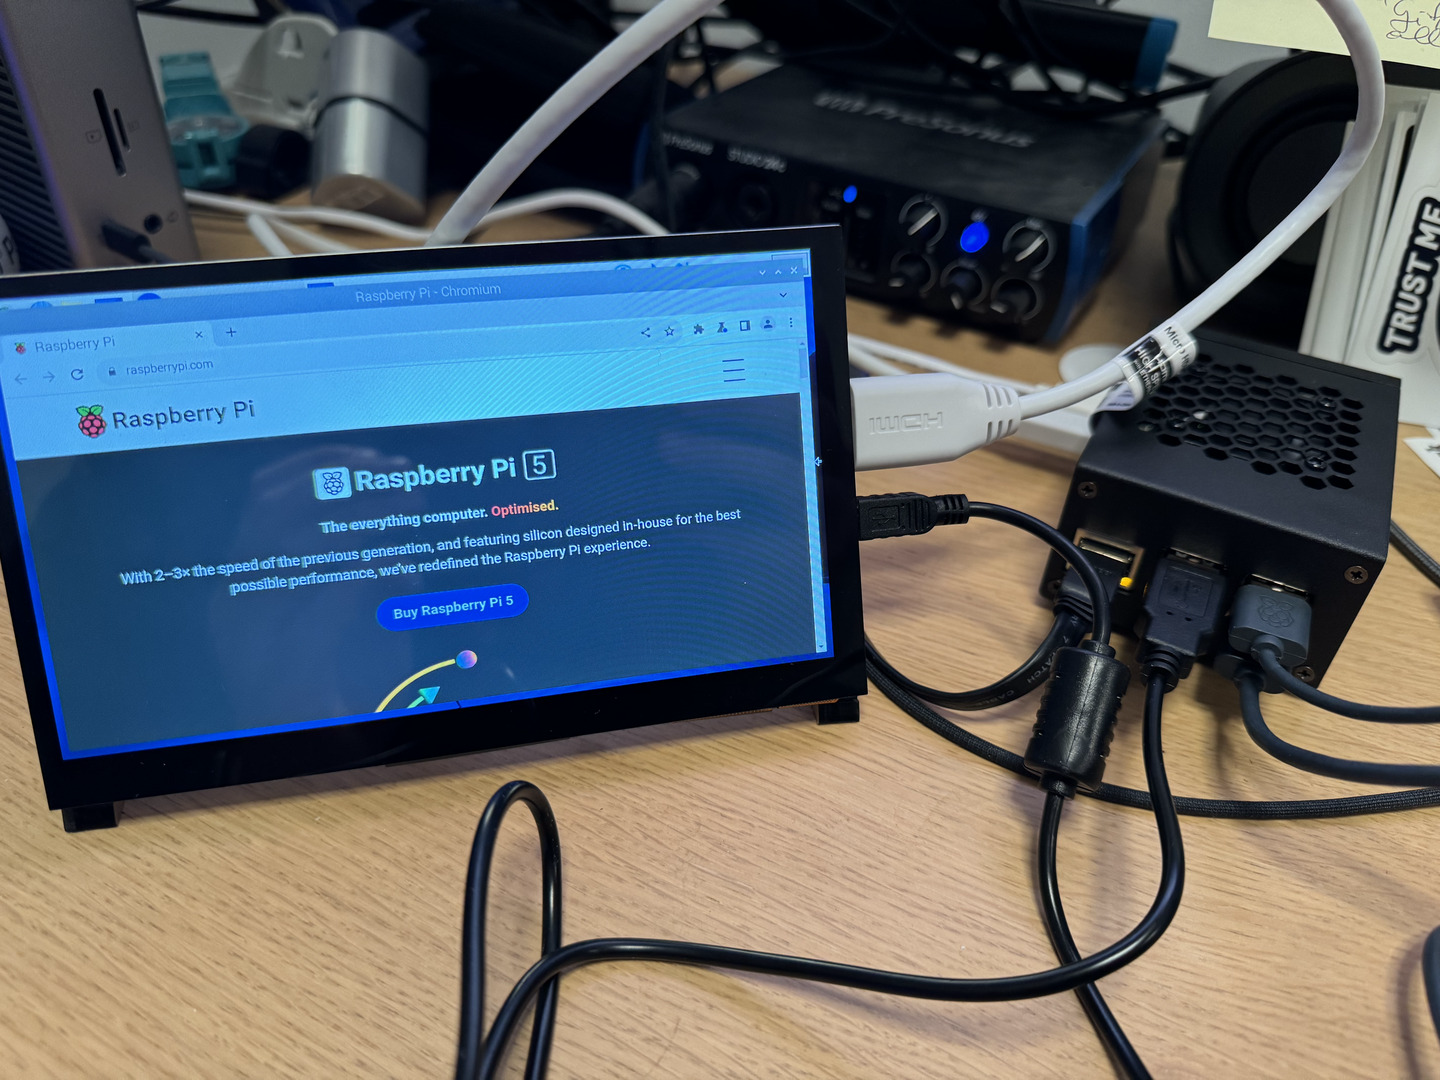
Touch Screen powered by Pi 5
Assemble the stand using two screws, add the audio speakers. Then connect the touch screen using the microHDMI port, and the USBA 3.0 to microUSB port for power supply and touch support.
Final result overview
The following video shows the touchscreen in action, and the assembly result.
What's next
The described setup is the foundation for future embedded hardware adventures. A few ideas include:
- Install Ollama and run local LLMs on a Raspberry Pi. Spoiler: The SD Card might get replaced with an SSD.
- Run Prometheus/OpenTelemetry/eBPF code and observe my home network. Spoiler: Might become an eBPF workshop on Raspberry Pi platforms.
- Install GitLab Runner and test software builds on Raspberry Pi 5. Spoiler: I am especially interested in AI-generated code using GitLab Duo.
We'll see later whether I'll build a Raspberry Pi cluster ;-)
Hope you enjoyed reading, see you soon!
Appendix: Hardware, costs, where to buy
- Raspberry Pi 5, 8 GB, Cooler Kit - 115 EUR - Weletron (official seller), raspberrypi.com with more alternatives
- If not using the Cooler Kit: Raspberry Pi 5, 8GB - 87 EUR, official active cooler - 6 EUR, power supply 27w USBC - 15 EUR, microHDMI cable - 6 EUR
- SanDisk Extreme Pro microSD 256 GB - 32 EUR - WD store, amazon.de
- Official Mouse/Keyboard, USB 2.0, black - 28 EUR - Welectron
- Metal case: GeeekPi Metal Case for Raspberry Pi 5, Support PCIe M.2 NVMe SSD Shield Top X1001 / X1000 / N04 /N05 & Raspberry Pi 5 Active Cooler - 16 EUR - amazon.de
- Display: WIMAXIT Raspberry Pi 4 Touch Screen, 7 Inch Portable Raspberry Pi IPS Screen 1024X600IPS with Tempered Glass HDMI USB Monitor for Raspberry Pi 5 - 66 EUR - amazon.de
Network, if needed:
- Network: NETGEAR GS305P PoE Switch 4 Port Gigabit Ethernet LAN Switch PoE+ 63W (5 Ports Plug and Play Network Switch PoE, Fanless, Robust Metal Case) - 55 EUR - amazon.de
- Network: 4x UGREEN CAT 7 LAN Kabel 10000Mbit/s Netzwerkkabel Ethernet Kabel (2M) - 9 EUR - amazon.de
If you need assembly equipment, consider these items:
- Wera Kraftform 2035/6 B Micro Screwdriver Set - 4 Slotted 2 Phillips - 23 EUR - amazon.de
- Knipex Electrical package with three VDE approved pliers - 68 EUR - amazon.de
- Geekworm Raspberry Pi Installation Tool 132 Pcs/Lot M2.5 Series Hex Brass Spacer/Standoff + Nuts + Screws Accessories Kit for Raspberry Pi 5 - 11 EUR - amazon.de