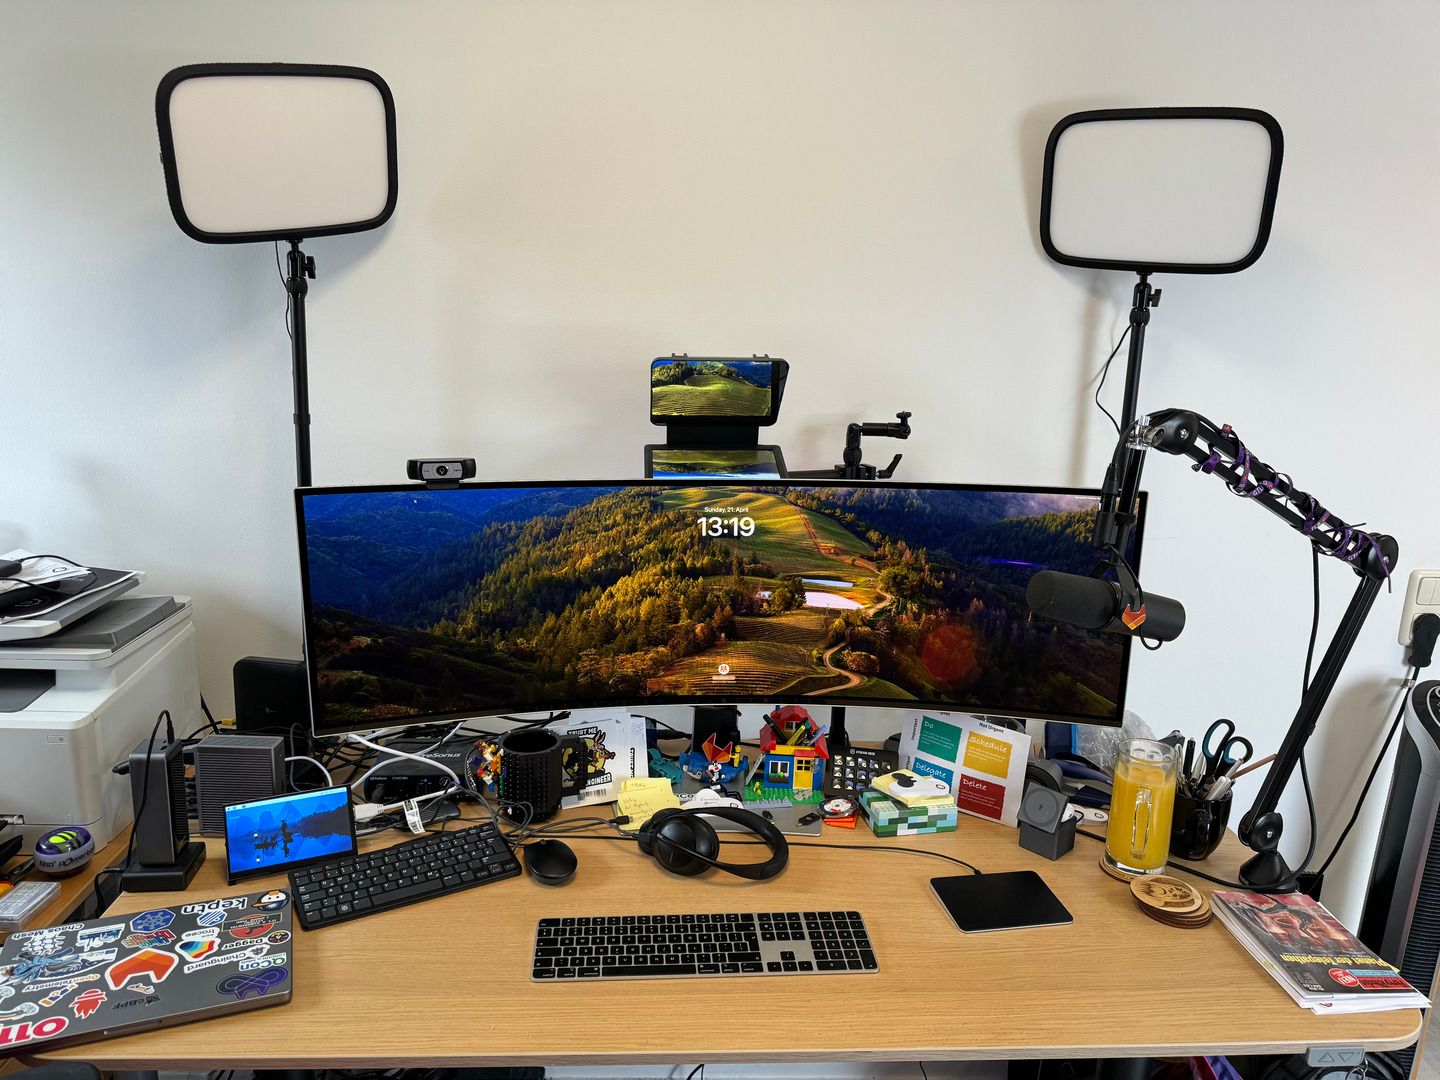
Remote workspace setup 4.0: Samsung Odyssey 49" monitor, Thunderbolt 4 dock, Elgato Prompter, Facecam Pro, Hue lighting
After four years of all-remote work, I upgraded my remote workspace setup. This article describes the research and considerations for a bigger monitor, improved lighting, and video recording investments while maintaining an ergonomic and healthy remote workspace.

After four years all-remote, I decided to upgrade my remote workspace setup. This article describes the research and considerations for a bigger monitor, improved lighting, video recording investments while still maintaining an ergonomic and healthy remote office.
Changes
In 2023, I observed a shift in Developer Relations, from speaking at events to content creation and customer centric engagement. My remote setup worked well with audio and streaming so far, but I never invested into a better video setup. I also see myself engaged with more virtual talks and webinars again, after feeling fatigued after 2.5 years during the pandemic. I asked myself: "What defines a great user experience in a recording or webinar?", looking into new webcam and prompter options for almost 1.5 years.
My 2024 decision also was to change my remote office space into a work environment, and a personal space for gaming and hardware experiments in a homelab. This idea required changes to connection management, and also inspired me to look for a bigger monitor, better lighting, and an improved audio/video experience.
In my role, certain items and accessories are helpful for more efficiency, while others are purely for self-learning, laziness and fun. All investments are listed and linked in the appendix at the end of this blog post, and are also updated in the all-remote workspace section on dnsmichi.at.
Monitor: From 34 to 49 inch
In 2023, I experienced more tasks that required 3+ open windows by default, with fast and reliable positioning. Content workflows require to read, experiment, code, generate, build, deploy, observe and draft a (blog) story in parallel. I also had seen my friends using 49 inch screens. And then I saw an advertisement for gaming monitors while researching on TV sound systems. The following video helped me refine my research on gaming monitors:
In the past 20 years, I made great experiences with Samsung and LG monitors, narrowing my search scope for reviews slightly.
Samsung Odyssey G93SC
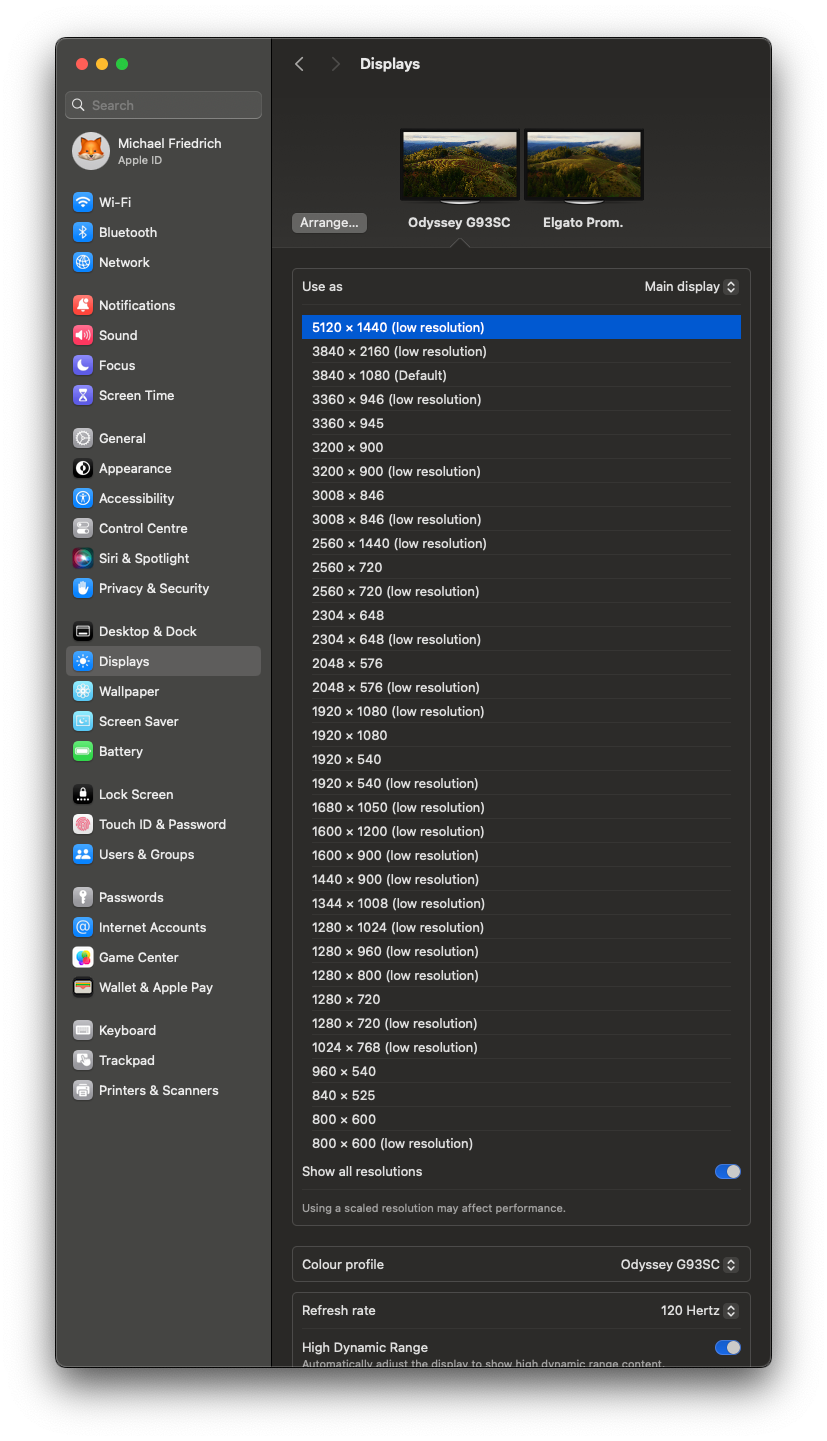
All review videos and articles had high praise for this monitor: Samsung Odyssey G93SC (German, English). Curved, 49" wide, 5120x1440 resolution, 32:9 form factor with OLED, made for an immersive gaming experience. Spending a few hours gaming is similar to working ;)

The monitor works best with DisplayPort 1.4 which provides a refresh rate of 120Hz @ 5120x1440. A higher refresh rate is easier on the eyes, together with the eye-saver mode. Connecting the Macbook Pro M1 using HDMI-to-HDMI/microHDMI worked, but only allowed 60 Hz refresh rate (later I learned why, missing HDMI 2.1 support for Macbook Pro M1). Therefore, I purchased a USBC-to-DisplayPort adapter cable: UGREEN USB C to DisplayPort 1.4 Cable 8K 60Hz 30Hz 4K 240Hz 144Hz HDR VRR Thunderbolt 4 3 DP1.4 on amazon.de, and later replaced it with a dock, read below.
This review video, together with a special deal (300 EUR off) on samsung.com made me buy the monitor.
Note: Samsung offers two versions, G95SC and G93SC, details in this Reddit thread. The G95SC model comes with an additional media hub for TV/streaming apps. This experience is similar to their TV operating systems which I find not great, so I opted to get the cheaper G93SC model instead. Its OSD menu also is a pain with the joystick. I only played with the backside lighting color profile once, used an USB stick to upgrade the firmware, and configured the video input source. The G93SC model seems to have regional availability only, I could not find it on amazon.com anymore.
Window management
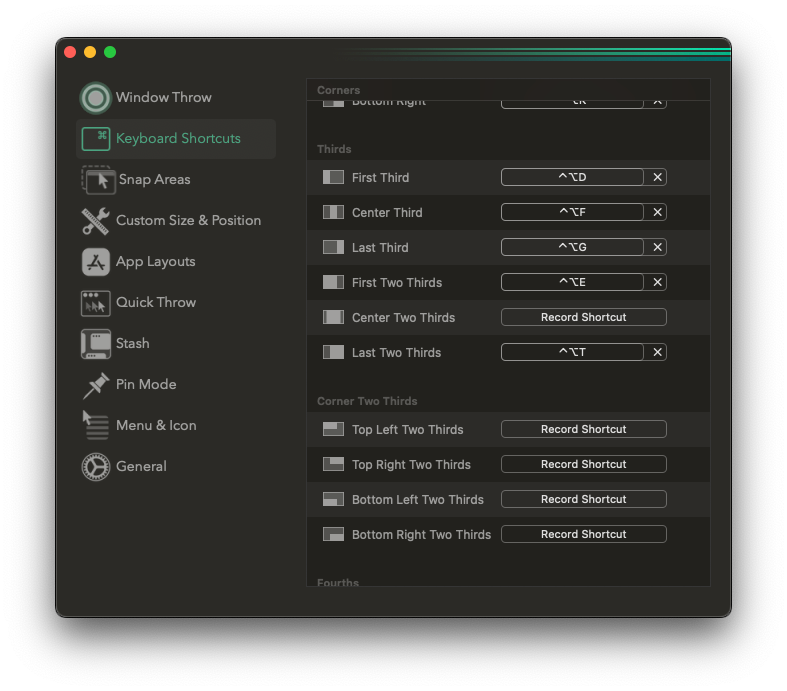
For window management, I bought the Rectangle Pro application on macOS. Rectangle Pro supports many keyboard shortcuts, I default to using ctrl option d or f or g to quickly position the selected window on the left/middle/right third of the screen.
My recent content updates for the GitLab Duo documentation, and new blog posts (10 best practices for using AI-powered GitLab Duo Chat) are already created with the help of the new monitor setup.
Elgato Prompter, Facecam Pro
I've noticed that I rarely looked into the webcam on top of my monitor when recording a talk, or engaging in a Zoom call. The LEGO minifigure trick on the camera only worked for a while ;)
How to change this habit? A camera with a visual representation whom I am looking at in a call, or slides would have been helpful. Friends got a so-called "Teleprompter", similar to what the TV industry is using. I had toyed with such a prompter to scroll my speaker notes, or generally force me to look into it. Many vendors required positioning an iPhone or tablet, adding more setup requirements and costs.
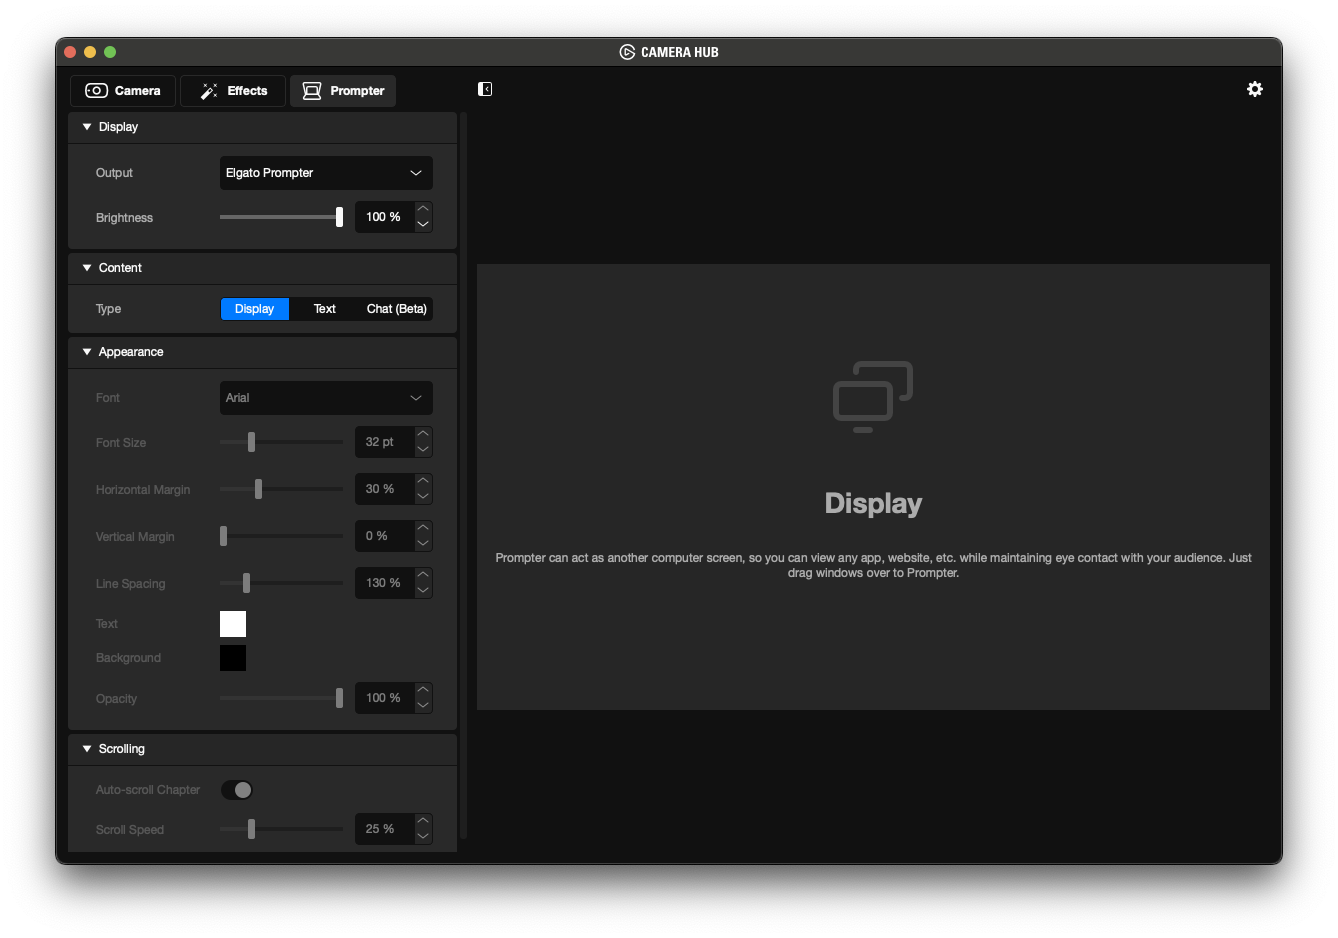
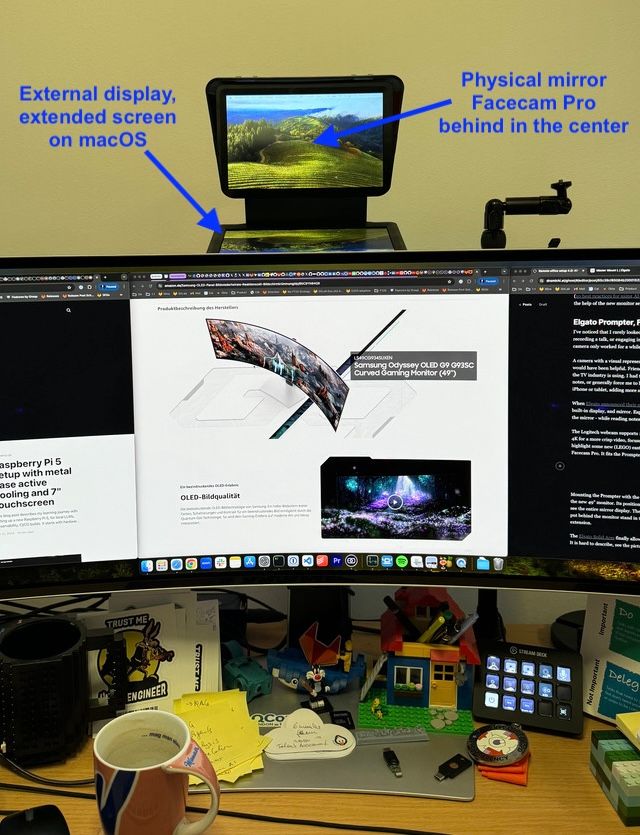
When Elgato announced their new Prompter product, I was fascinated by the built-in display, and mirror. Especially, because the camera can positioned behind the mirror - while reading notes, you always look into the camera. The Logitech webcam supports 1080p as resolution. After 4 years, I wanted to try 4K for a more crisp video, focussing on the speaker and background (and also to highlight some new (LEGO) eastereggs). This idea brought me to buying the Elgato Facecam Pro. It fits the Elgato Prompter setup perfectly, albeit it is quite expensive and only recommended when you plan with lots of streaming and talk recordings.
The Prompter provides its own external display, which can be configured as extended screen in macOS. The Camera Hub app provides many more configuration options.
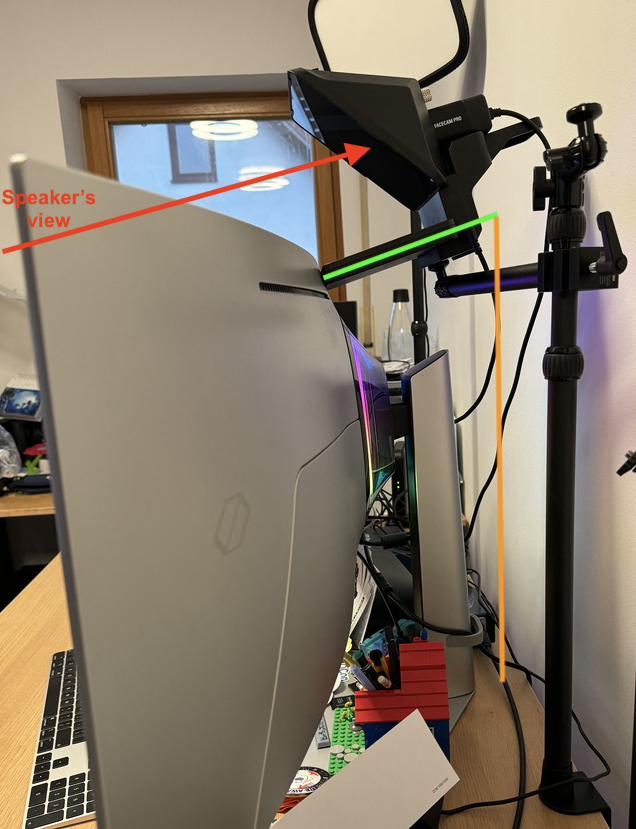
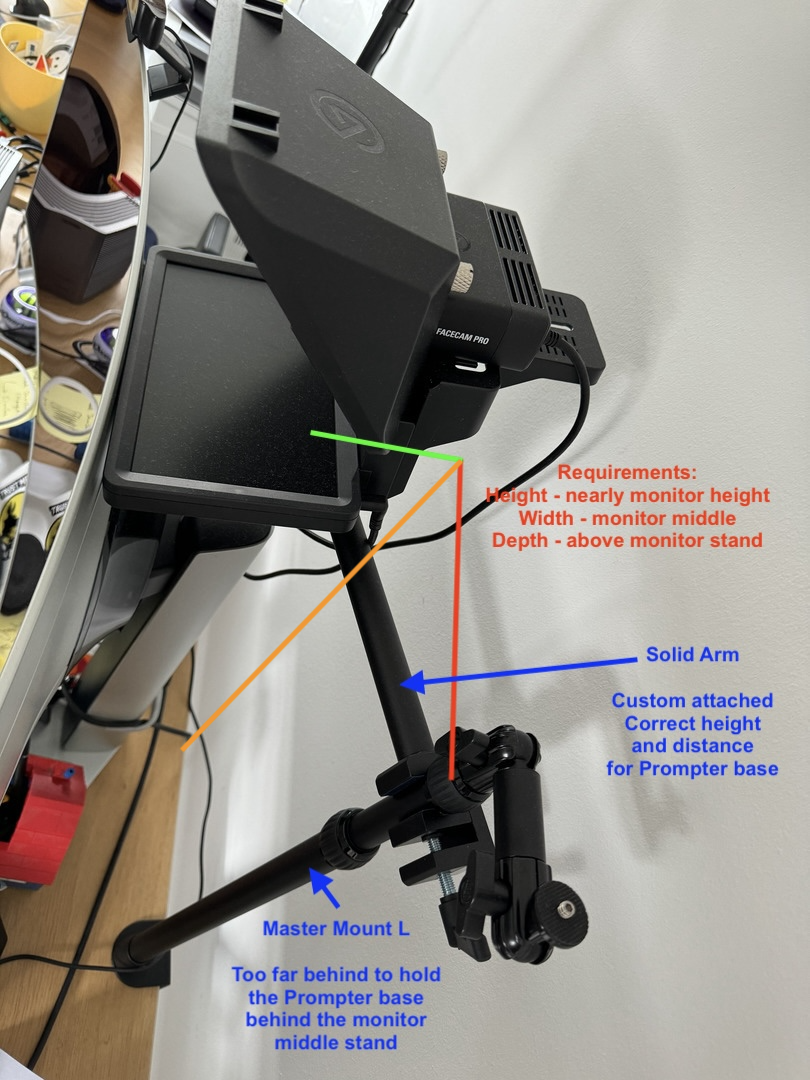
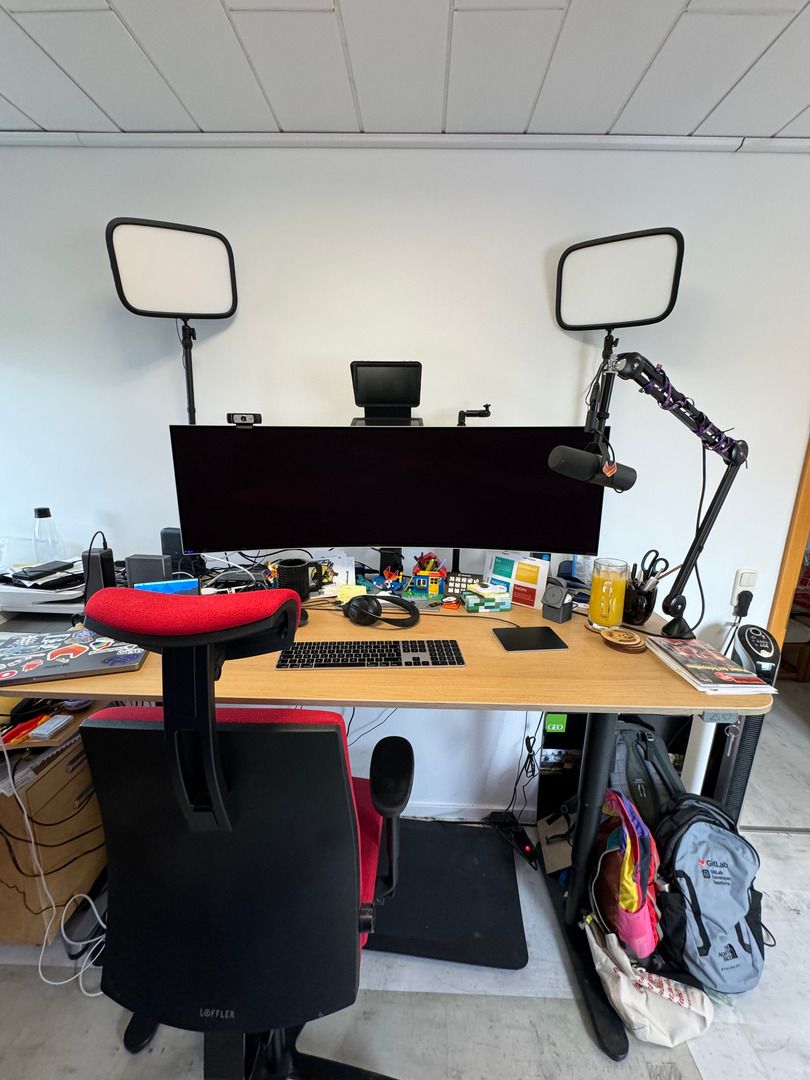
Mounting the Prompter with the FaceCam Pro turned out to be challenging with the new 49" monitor. Its position needs a specific angle so the speaker's eyes look up, and see the entire mirror display. The vendor-suggested Master Mount L could not be put behind the monitor stand in the middle, requiring an additional arm extension.
The Elgato Flex Arm Kit looked promising for extending the distance to the monitor. It needs to be attached directly to the top of Master Mount L, and was able to solve the distance problem - but brought a new problem with 10 cm too high, unable to match the speaker's viewing angle into the mirror (marked green in the picture). The Elgato Solid Arm finally allowed a side-way diagonal height adjusted position. It allows to attach to the Master Mount L with a custom lock, and mounts the Prompter/Facecam perfectly into the middle of the monitor, at the correct height for the speaker's view.
The setup is not perfect yet so I'll continue iterating on more Prompter efficiencies.
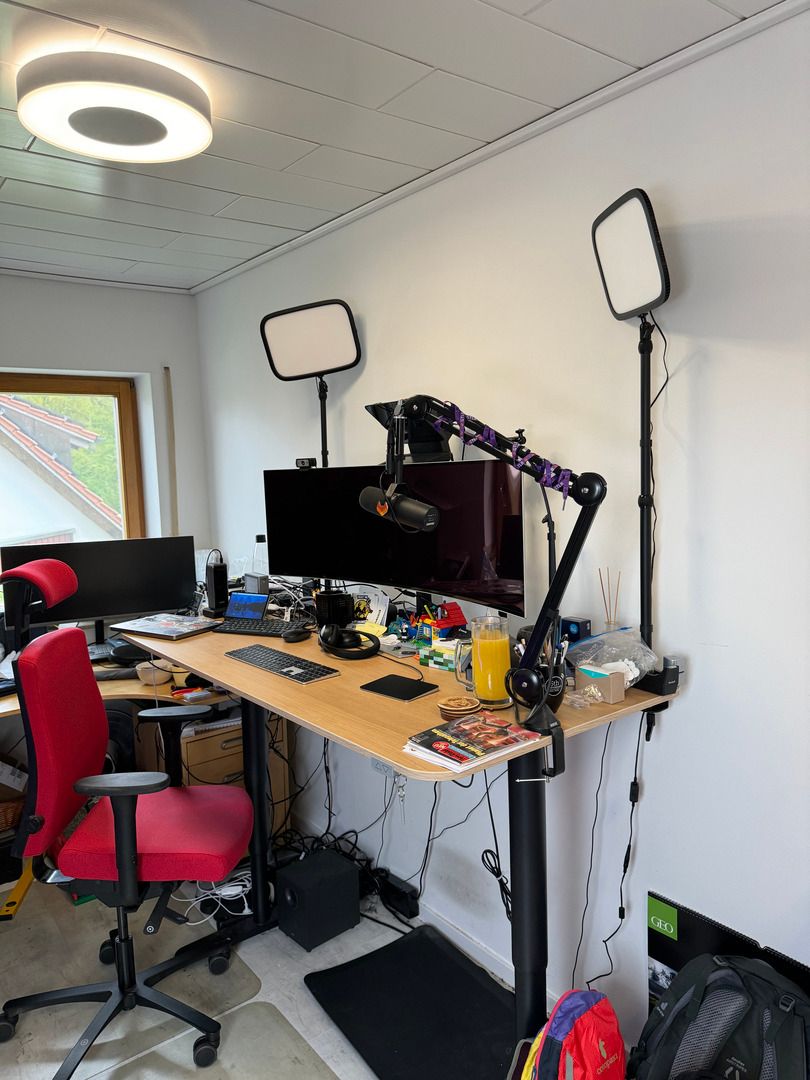
Lighting
The 2023-new flat had different lighting, with rooms under the attic and windows left and back right, causing some glares on my face. I fixed lighting in two steps:
- Upgrade to Philips Hue White & Color Ambiance Infuse Large Ceiling Lamp, L white (2x) - philips-hue.com
- Invest into 2 Keylights left/right of the desk, Elgato Keylight MK.2 (2x) - elgato.com
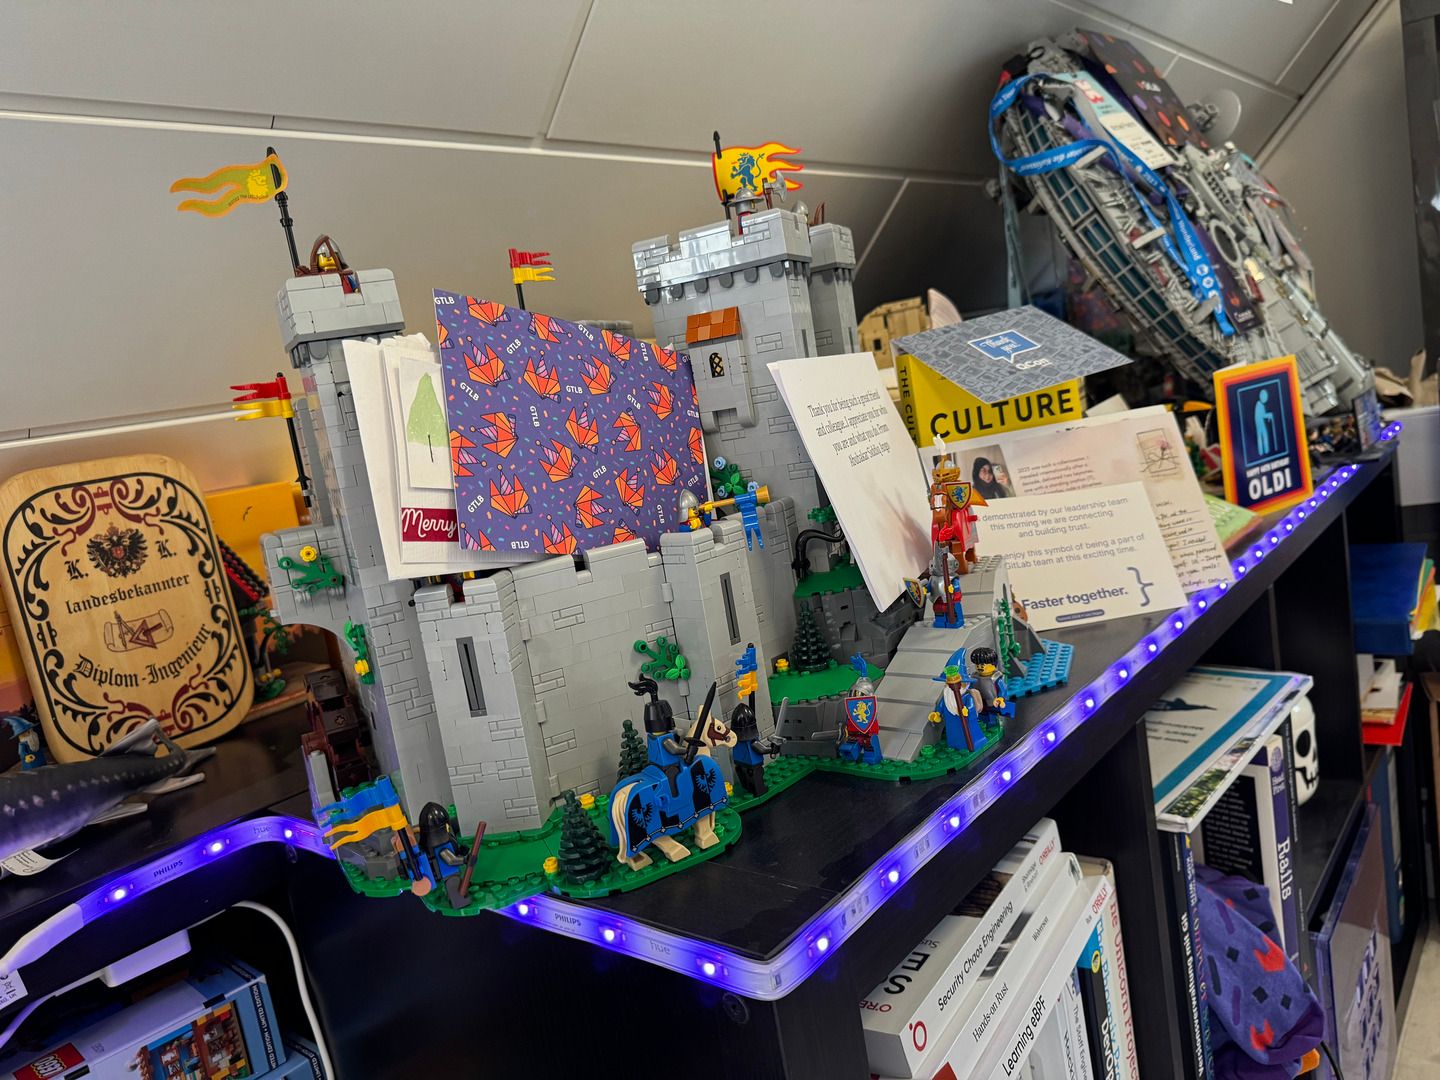
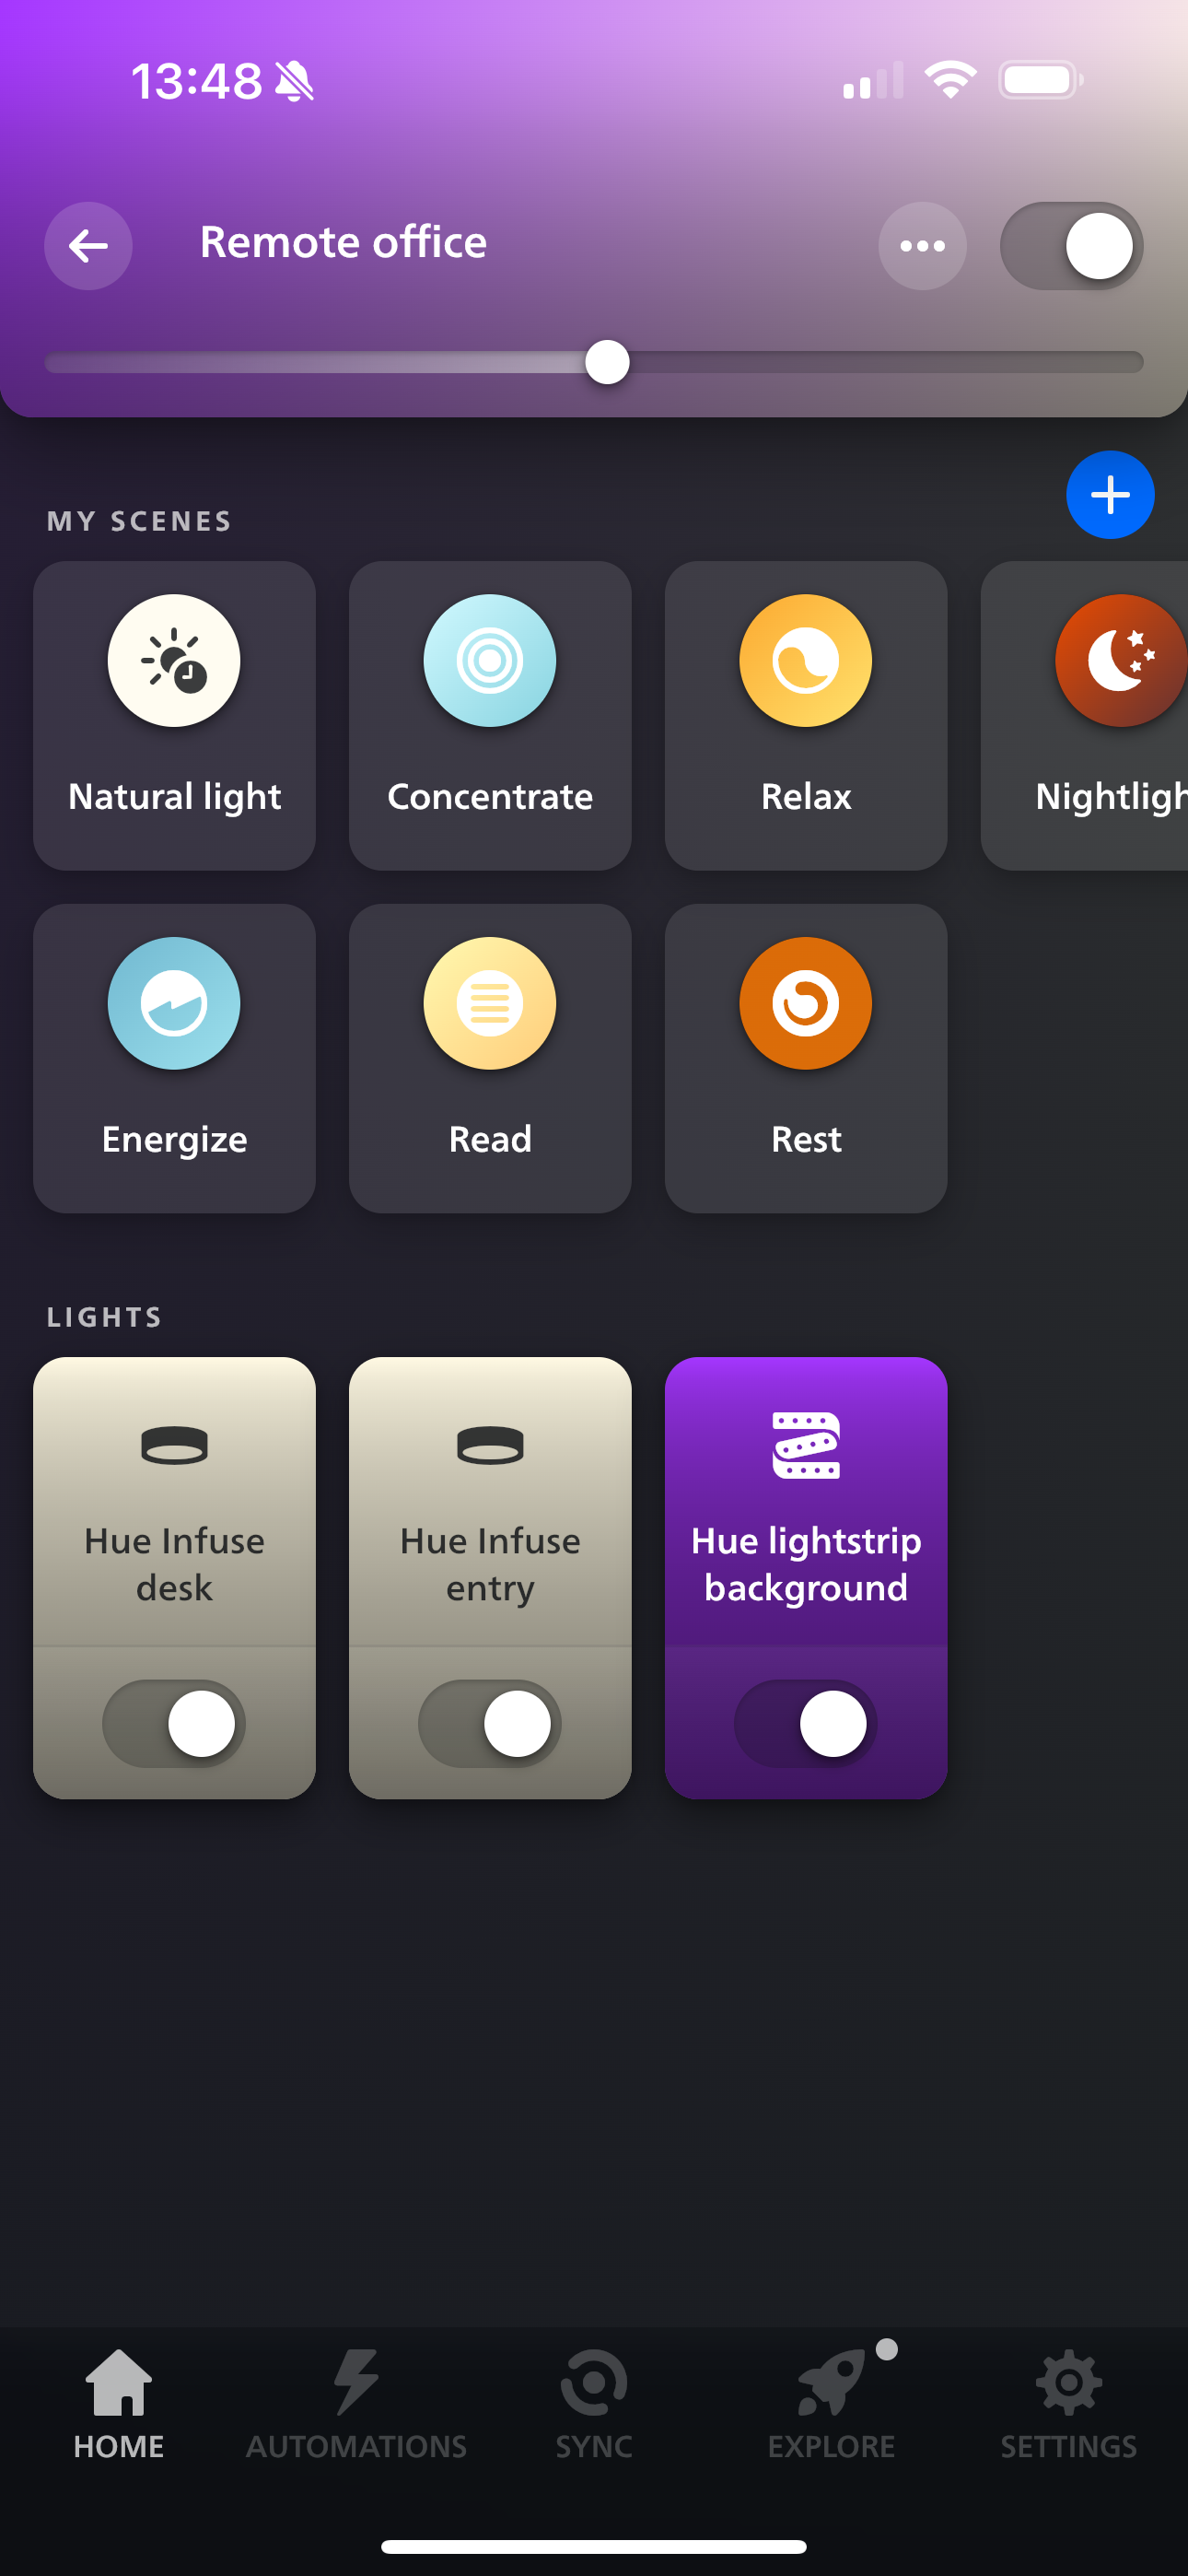
Additionally, I added a Philips Hue White and Colour Ambient Lightstrip Plus (amazon.de) into my background to experiment with different color themes and easter eggs.
The Hue lights are connected to a central Philips Hue bridge, which itself is connected to Apple's Home app. "Hey Siri, remote office light on" has become my new routine during focus work.
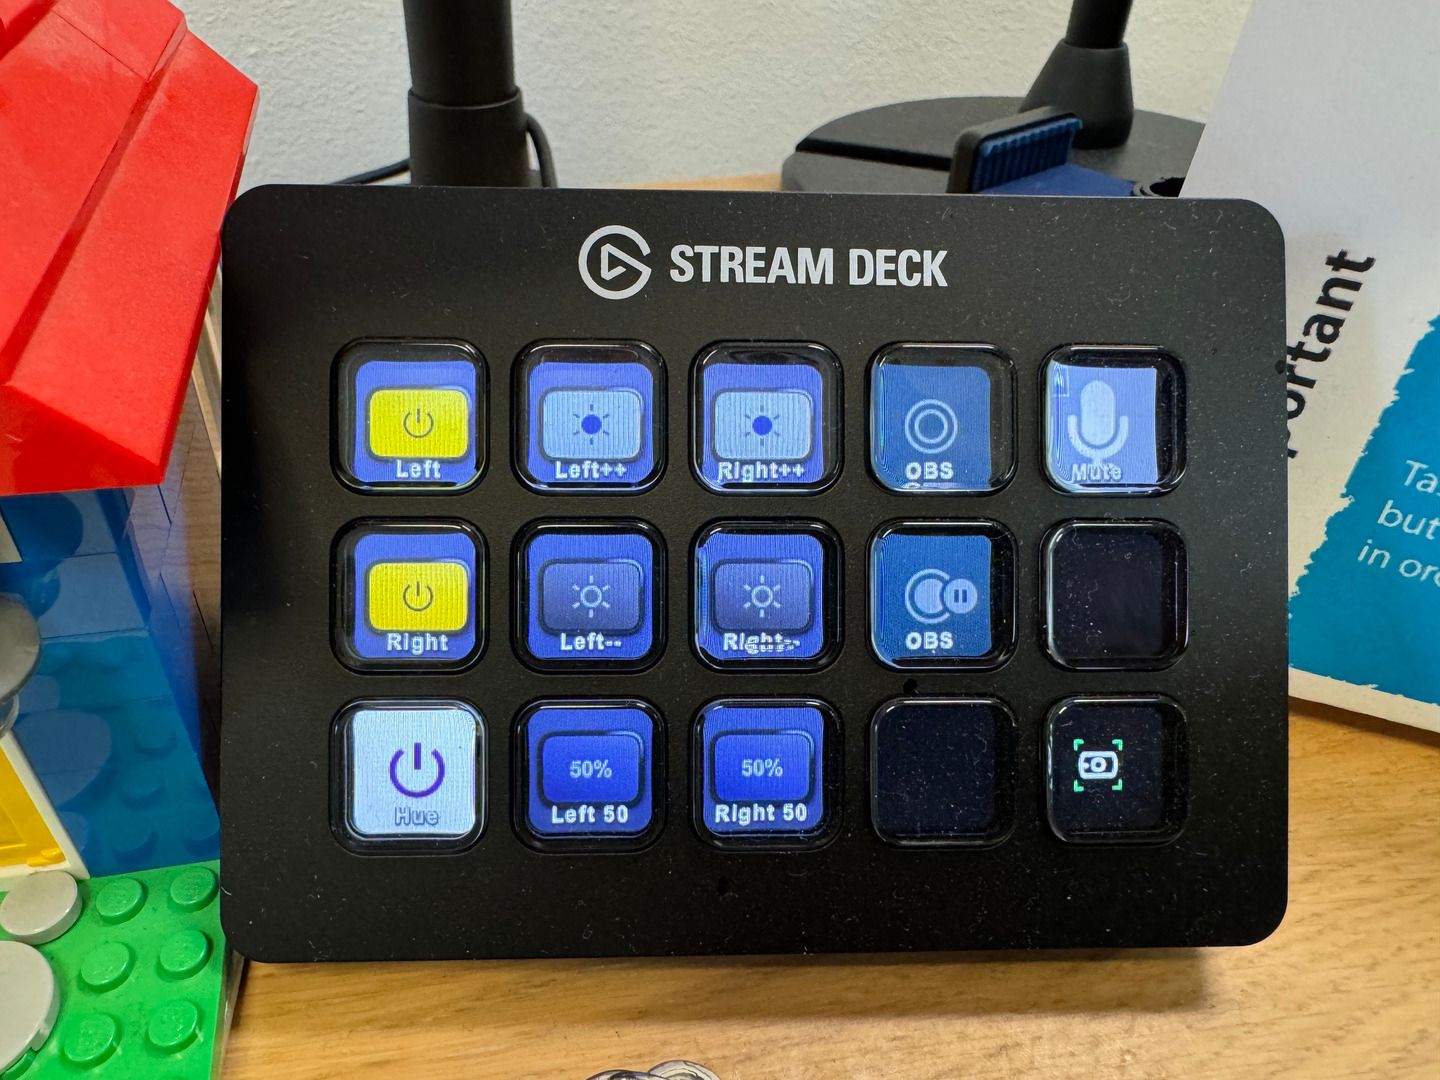
Control: Streamdeck
The Philips Hue bridge can be connected to Streamdeck, similar to the Elgato Keylight. The Keylight supports increasing the dimming value, too. You can configure OBS to start/stop recording, mute/unmute. The Elgato plugins marketplace offers more helpful integrations.
Connection management
While researching on upgrading my setup, I was worried about additional ports and connections.
- USB-C for PreSonus external audio interface, connected to Sure SM7B microphone (details in this blog post)
- USB-C backup SSD for time machine
Additional requirements
- USB-C for Elgato FaceCam Pro
- USB-A with power output for Elgato Prompter
- USB-A with power output for Elgato Streamdeck
- USB-A with power output for Logitech Webcam (optional)
- Displayport 1.4 (direct or through USB-C) or HDMI for the Samsung Odyssey 49" monitor
Research: Adapter, hub or dock?
Mobile adapters for USB-C allow to extend all sorts of interfaces: USB-C, USB-A, HDMI, Ethernet, SD-card slots, etc. They are limited to host system support, especially when the USB ports need to provide certain power output. There are also limitations with splitting USB-C: While possible, only data throughput and no power is supported.
A hub or docking station with additional power supply was required. Trusting Anker for power charging, I looked up their portfolio for USB hubs. The Anker 575 USB-C Docking Station (13-in-1) looked promising at first, but was focussed on multi-monitor setups and a bit too pricey for that functionality. With Apple changing back to Magsafe for power charging, the necessity to charge the host system through USB-C was not important in my research, too.
I refined my search to usbc hub docking station and started reading lots of articles and reviews. The most helpful article was by PCWorld: Best USB-C hubs and dongles 2024: Add ports to your laptop or tablet and provided me with a sense of the current market and options. I quickly learned that my requirements with at least 3x USB-C and 3x USB-A cannot be easily fulfilled. And that it gets more complex with display requirements (60Hz @ 4K).
Traditionally, the only other alternative was a Thunderbolt dock. Provided your laptop had a Thunderbolt port, Thunderbolt’s 40Gbps bandwidth allows for two 4K displays, running at 60Hz, plus various peripherals.
I continued reading the linked article "Best Thunderbolt docks 2024: Extend your laptop’s capabilities" and came to the conclusion that Thunderbolt 4 would support my requirements better.
This recommendation comes courtesy of our colleagues at Macworld, who have compiled their own list of best Thunderbolt docking stations for the Apple Mac market. “All the ports you could want coupled with high-wattage charging justify the price of this full-featured dock,” and who are we to argue?
I was using the wrong keywords all along, and continued with focus on thunderbolt 4 docking station.
 Simon Jary
Next question: Which ports and versions are supported? The Macbook M1 Max supports Thunderbolt 4.
A dock seemingly increased the price tag to 300-500 EUR but was able to fulfill the 3x USB-C and 3x USB-A requirements, and DisplayPort 1.4. After evaluating the different port options, researching on the companies and their product reviews, and pricing, I landed on these two options:
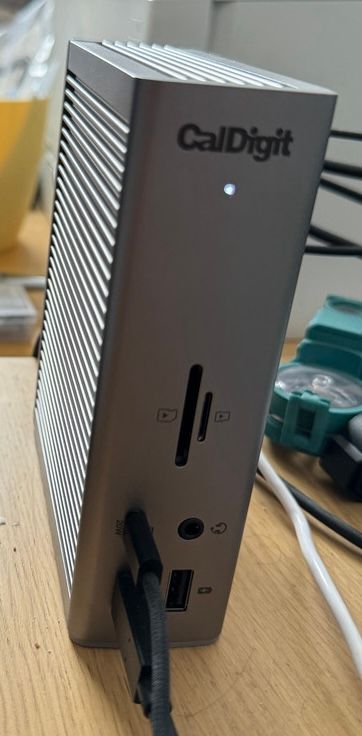
- CalDigit Thunderbolt Station 4 supports 6x USB-C ports (3x Thunderbolt 4/USB4, 3x USB 3.2 Gen 2), 5x USB-A (3.2 Gen 2), 1x DisplayPort 1.4 and more.
- Sonnet Echo 20 Thunderbolt 4 SuperDock supports 1x upstream Thunderbolt 4, 2x downstream Thunderbolt 4, 4x USB-C, 4x USB-A, 1x HDMI 2.1 and more.
The Samsung Odyssey monitor prefers DisplayPort 1.4 for full resolution and 120 Hz. HDMI only allowed for 60 Hz in my tests. Sacrificing a USB-C port on the Sonnet dock for the DisplayPort adapter cable could have worked, but I went with the CalDigit TS4 dock with more USB-C/A ports and native DisplayPort support.
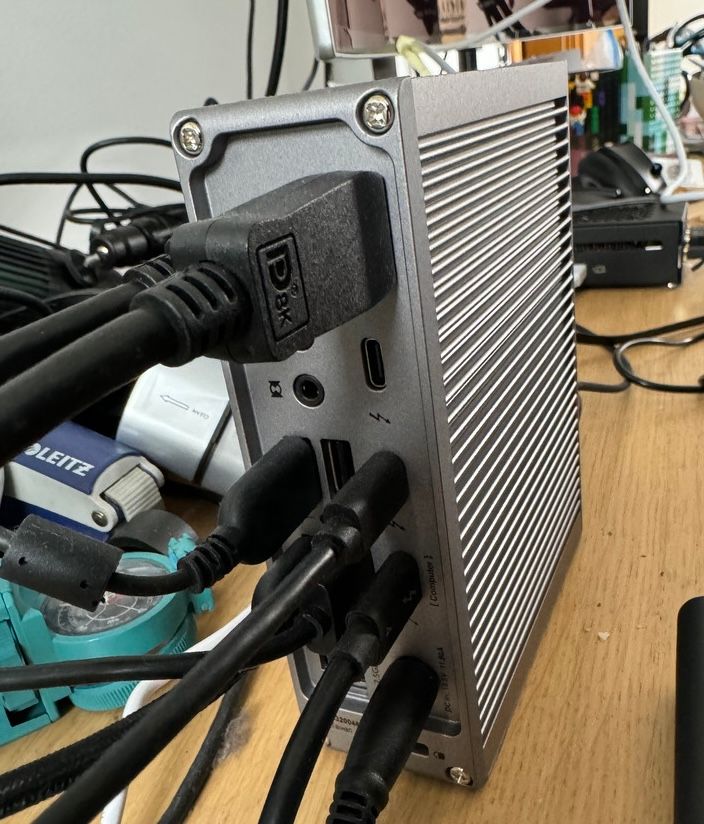
After 2 months, everything works like expected. The Macbook Pro can be connected through Thunderbolt 4, and does not require any extra cables. This setup allows me to add a private Macbook Pro in the future, and swap environments more easily.
If you are looking for notable disadvantages: The CalDigit TS4 is expensive with ~400 EUR, it gets warm with many power consumers, and sometimes ejects the backup disk on the front USBC port (use a backside port instead).
Mobile charging and travel
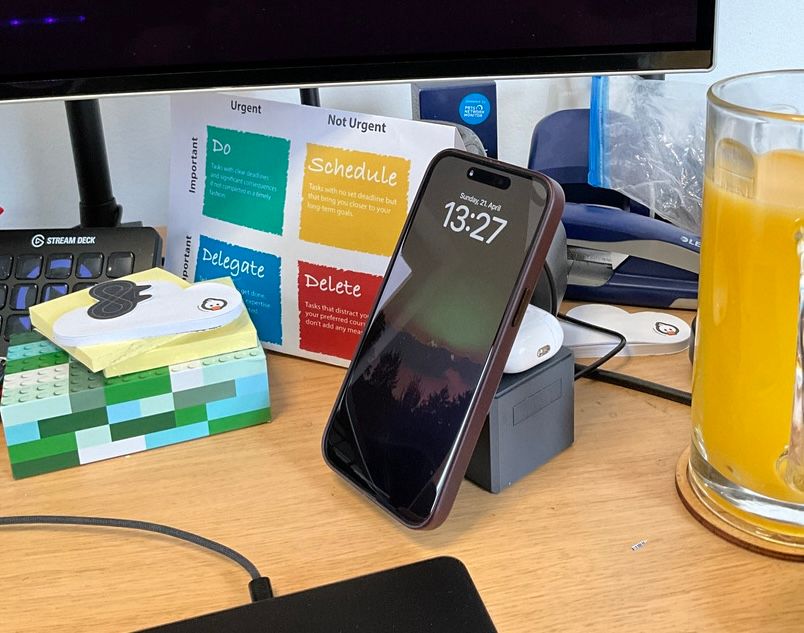
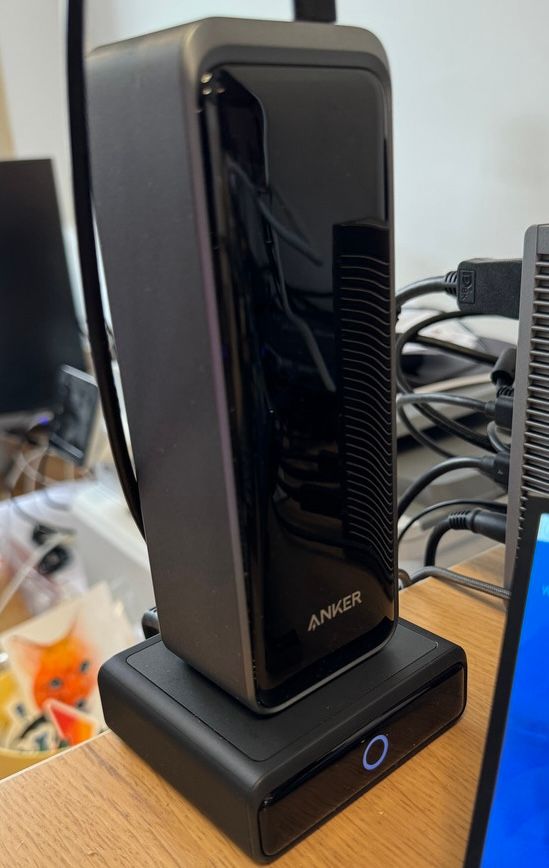
The new Thunderbolt hub provides iPhone charging through USB-C but I was looking for the same contactless MagSafe comfort I use everywhere. The Anker 3-in-1 Cube with MagSafe allows charging my iPhone 15 Pro Max with 15 watts, and simultaneously charges AirPods and Apple Watch. The cube is a bit pricy with 130 EUR, but provides a stable magnetic stand on my desk and allows for quick iPhone access when needed.
For travel, I need the flexibility with a power bank which can also charge a Macbook Pro. While looking into the Anker MagSafe Cube, I noticed the Anker Prime 27,650 mAh Power Bank (250 W) and put it into my review-and-buy list in 2024. Anker also offers a portable docking station for the power bank, with 3 more USB power ports, too. Never forget to load the power bank before travel again :)
Remote office, assembled
I researched and weighed on pros/cons over many months, sometimes waiting for special deals (Black Friday, spring offers, etc.). Ultimately, the assembled new items were bought in the past 1.5 years, and are my personal investments.
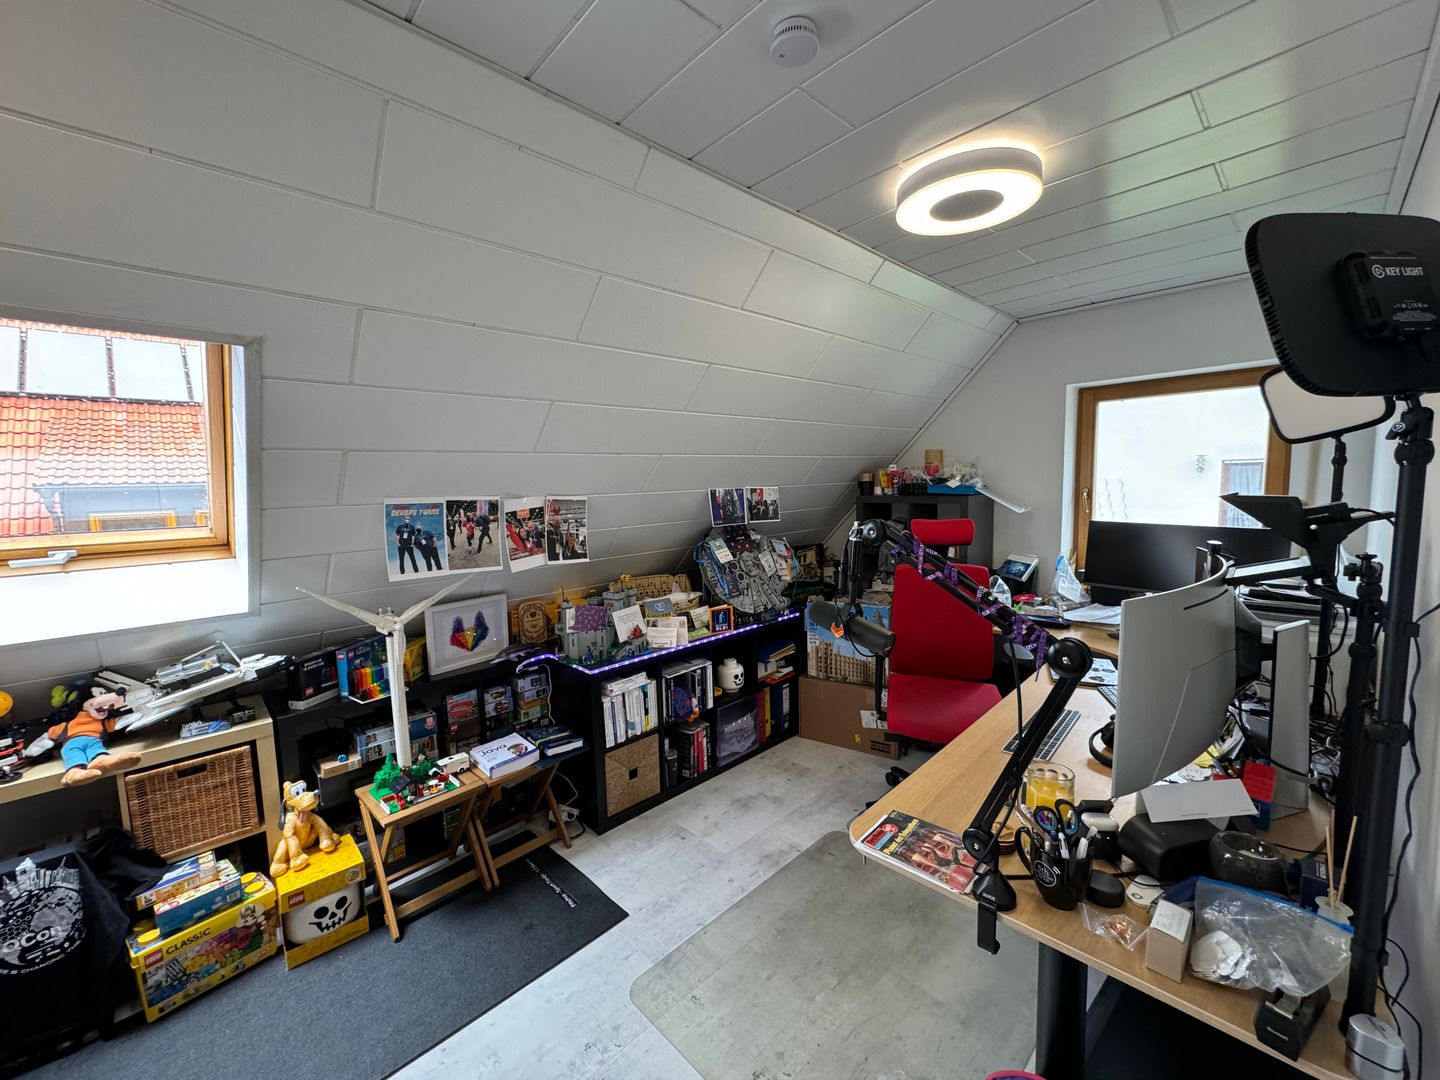
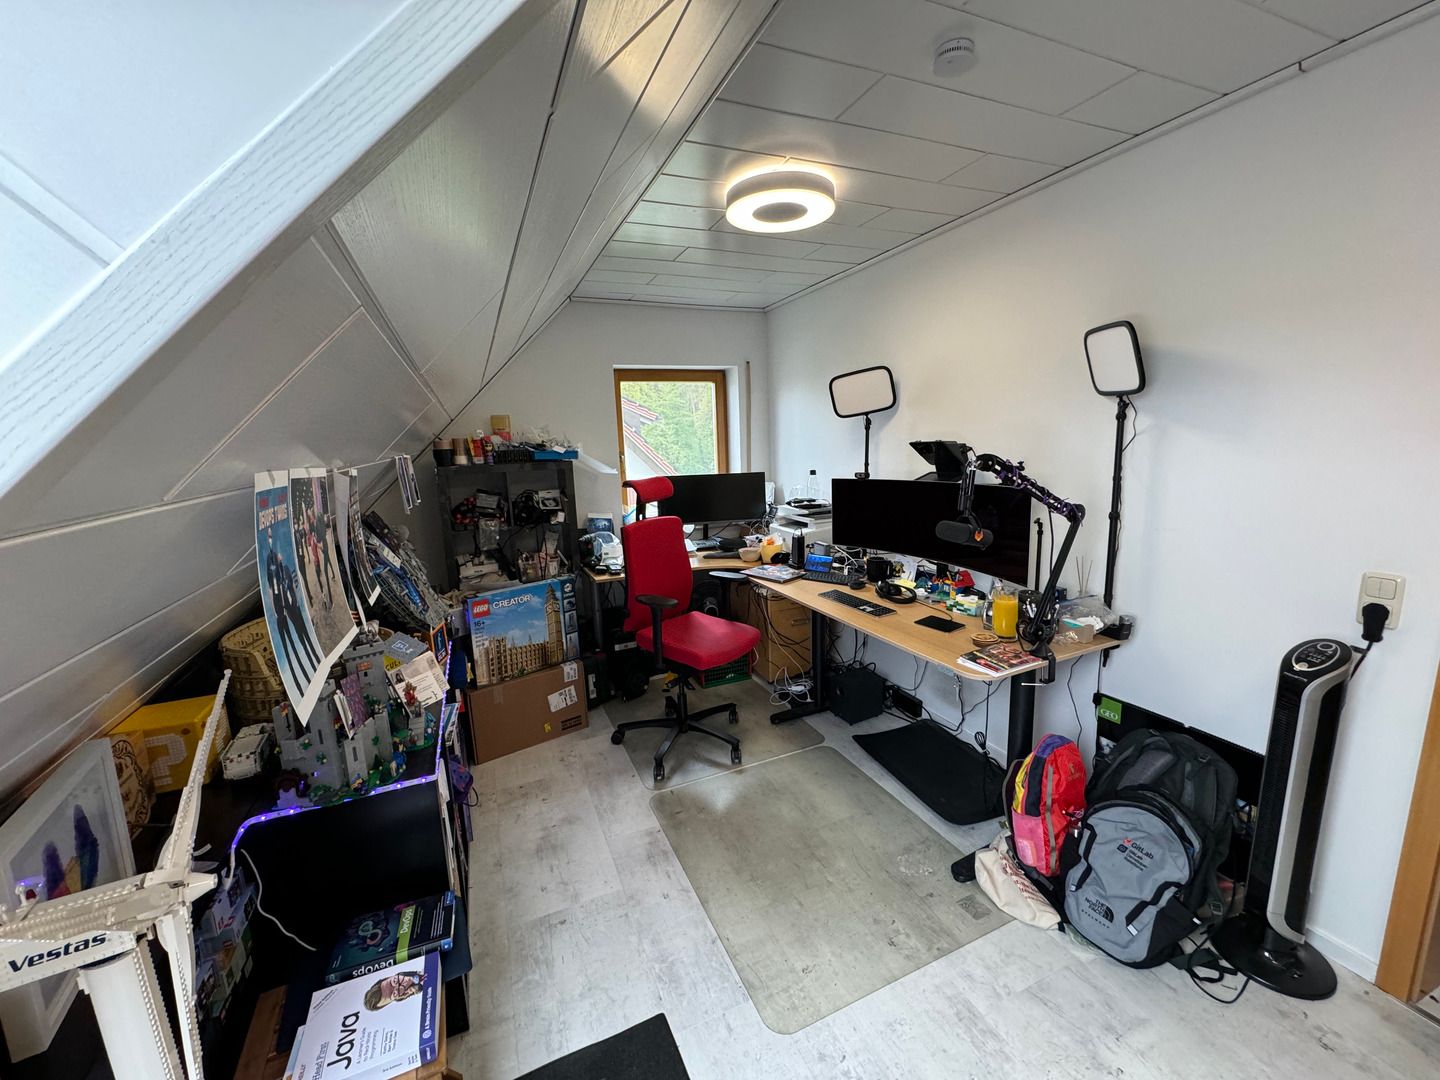
Key benefits for myself:
- Standing desk and ergonomic chair, together with a large curved screen, with 3+ windows to work more efficiently.
- Better lighting improves well-being and quality of remote calls and recordings.
- FaceCam and Prompter solve a long standing bad habit, and ensure more authentic videos.
- The CalDigit TS4 dock organizes all connections, and allows me to swap the work Macbook with a private Macbook more easily.
- Foundation for more Homelab ideas - the new Raspberry Pi 5 is just the start :)
Hope you enjoyed reading, and now feel inspired to iterate on your remote setup! :-)
Appendix: Hardware, where to buy
Video
- Samsung Odyssey OLED Gaming Monitor G93SC (49") - samsung.com
- Elgato Prompter - elgato.com
- Elgato Facecam Pro - elgato.com
- Elgato Master Mount L - elgato.com
- Elgato Solid Arm - elgato.com
- Elgato Streamdeck MK.2 - elgato.com
Lighting
- Elgato Keylight MK.2 (2x) - elgato.com
- Philips Hue White & Color Ambiance Infuse Large Ceiling Lamp, L white (2x) - philips-hue.com
- Philips Hue White and Colour Ambient Lightstrip Plus - amazon.de
Connection management
- Caldigit TS4 dock, supports 6x USB-C ports (3x Thunderbolt 4/USB4, 3x USB 3.2 Gen 2), 5x USB-A (3.2 Gen 2), 1x DisplayPort 1.4 and more - caldigit.com, amazon.de
- Anker 3-in-1 Cube with MagSafe, 15W Wireless Maximum Charging Power, Compatible with iPhone 15/14/13/12 Series, Apple Watch Series 1-7/SE, and AirPods Pro/3/2 (Includes 30W Power Supply) - amazon.de
- Anker Charging Station for Anker Prime Power Bank, 100W Fast Charging Power with 4 Ports - amazon.de
Travel
- Anker Prime 27,650 mAh Power Bank (250 W), 3-Port Power Bank, Smart App Control - amazon.de
Oh, you are still here :)
Here's the Philips Hue Lightstrip in rainbow color theme motion experiment.